Decepticon Truck Crawl
The Making Of
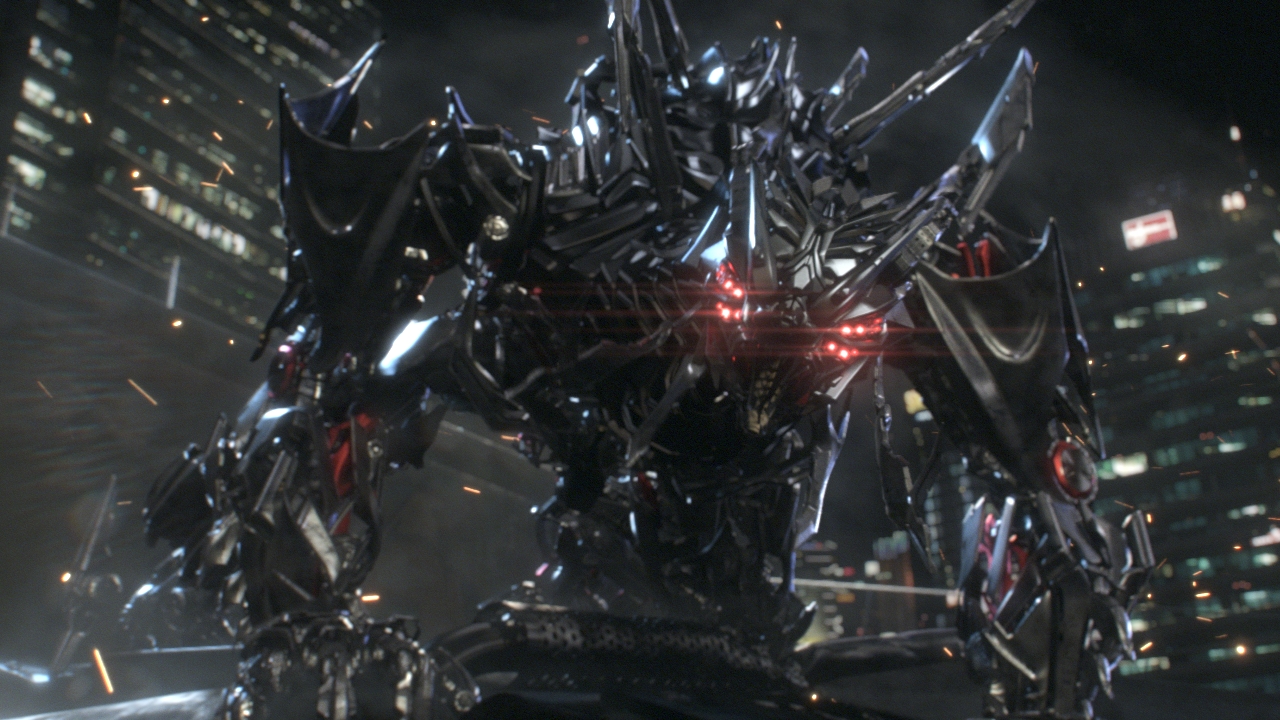
Table of Contents:
Final Video
Overview
The Team
Concept Design
Modeling
Rigging
Animation
Compositing
Final Video:
Decepticon Truck Crawl from Kiel Figgins on Vimeo.
Overview:
With the announcement of Transformers 4, my friends and I set out to create our own Transformer project. This particular project is a more of motion test for a longer, 40 second short involving the same character. In this case, we wanted to create a single shot to verify the character in his design and presence, as well as the workflow we would use for the full project later on.
This short was created over scattered nights and weekends for five months. This includes design, exploration, modeling, rigging, animation, all the way through scene finishing and post work. Since all those involved in the project work full time, the work needed to be spread out over a longer time line to keep the quality high for each facet.
The Team:
Kiel Figgins ( www.3dFiggins.com ) : Animation / Team Lead.
George Longo ( www.twenty100.net ) : Modeling / Design
Arutyun Artur Sayan ( www.artursayan.blogspot.com ) : Lighting / Look Dev
Joe Spano ( www.joespanovfx.com ) : Compositing
Zach Christian ( www.DigitalFxRealm.com ) : Matte Painting
Wayne Hollingsworth ( www.WaynArt.com ) : Effects
Justin Albers ( www.cargocollective.com/wwwjustinalbers ) : Concept / Design
Keith Ruggiero / Chaz Windus ( www.soundsred.com ) : Sound Design
Ed Laag ( www.cargocollective.com/EdLaag ) 2D post Effects for the intro and outro
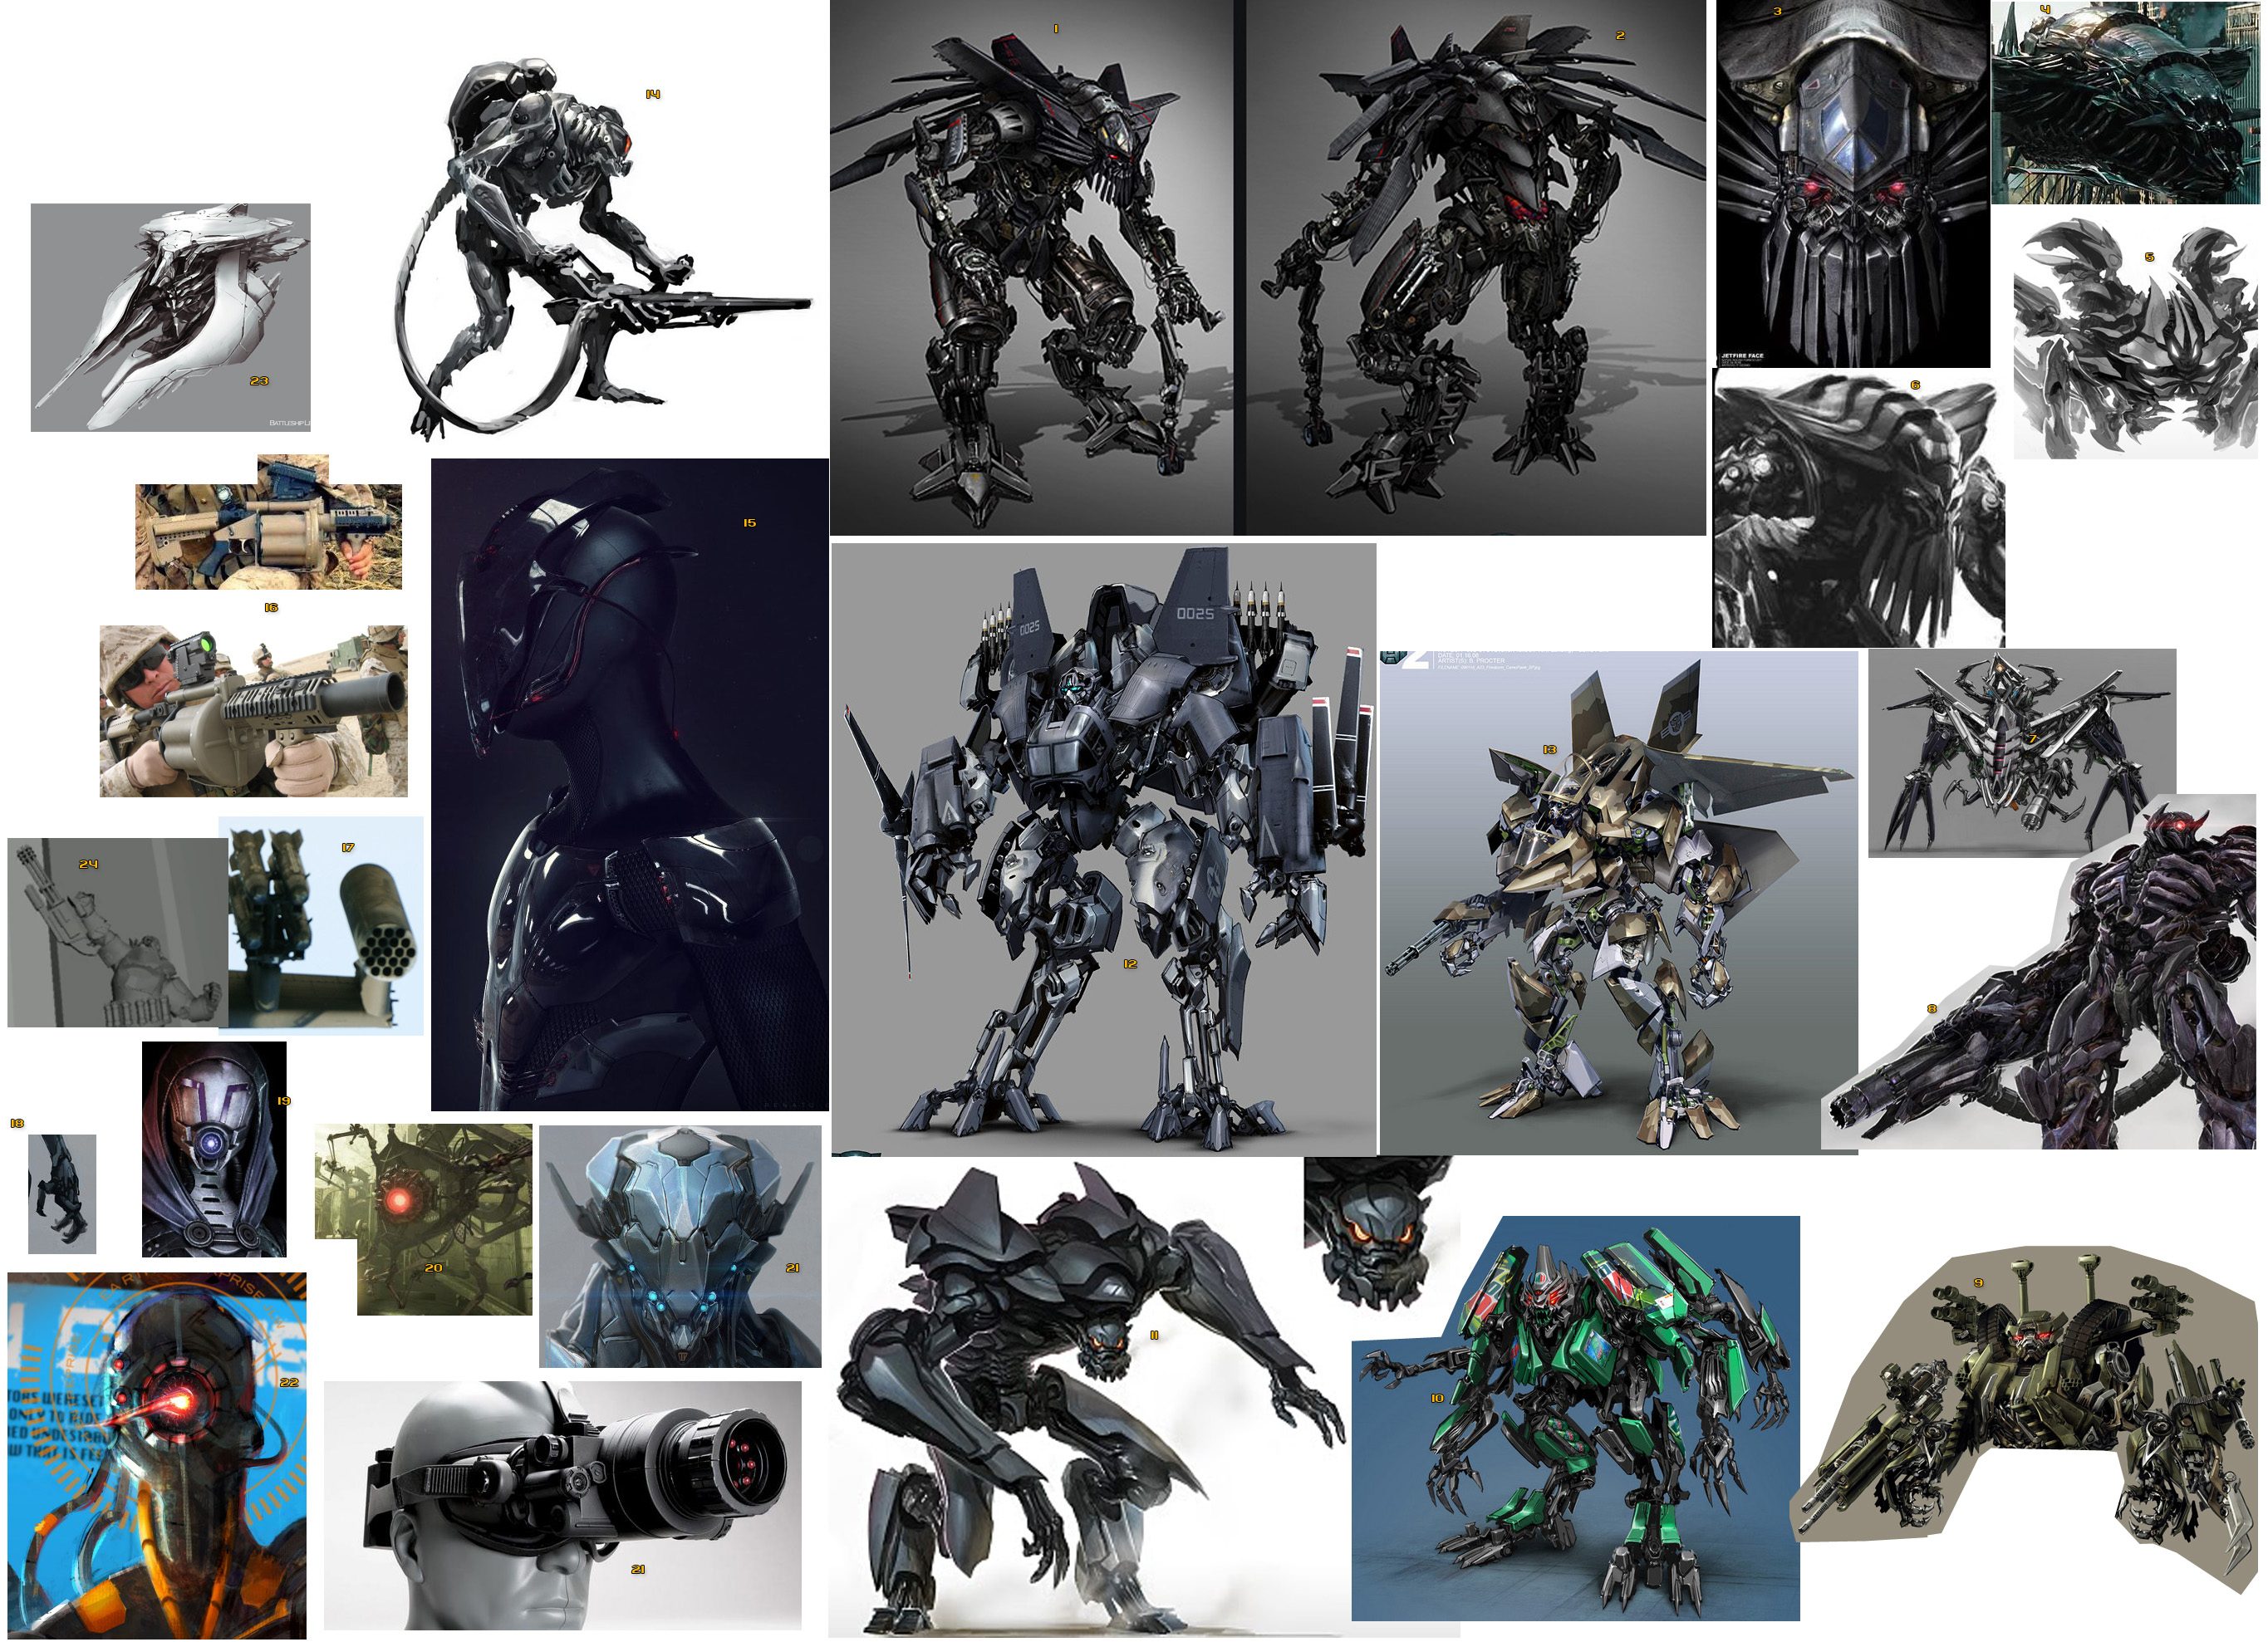
Concept/Design:
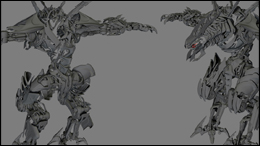
Right form the start of this project, we wanted to create Decepticon, not an Autobot. In the latest Transformer movies, the Autobots more closely resemble what they transform from. These design show elements like car doors and wheels, where as the Decepticons were more angular and abstract with shards protruding out of their silhouette.
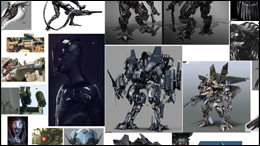
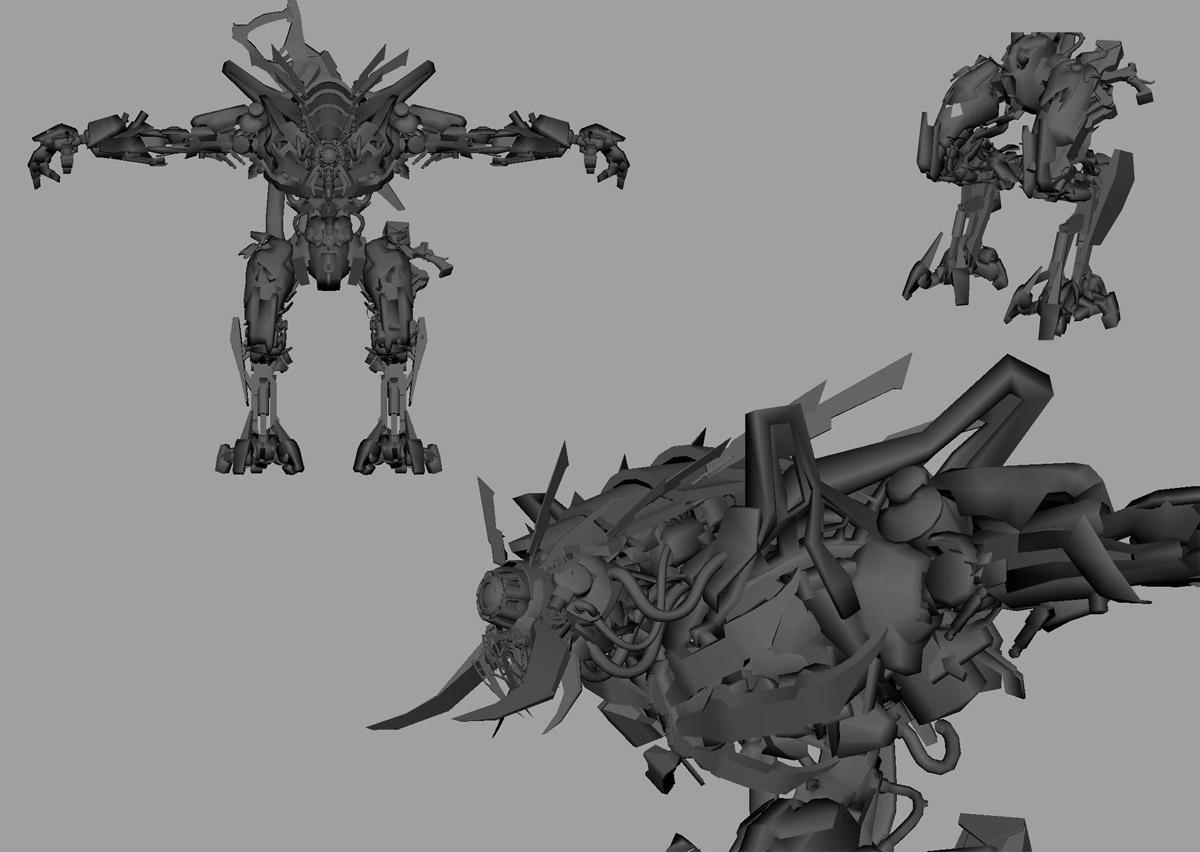
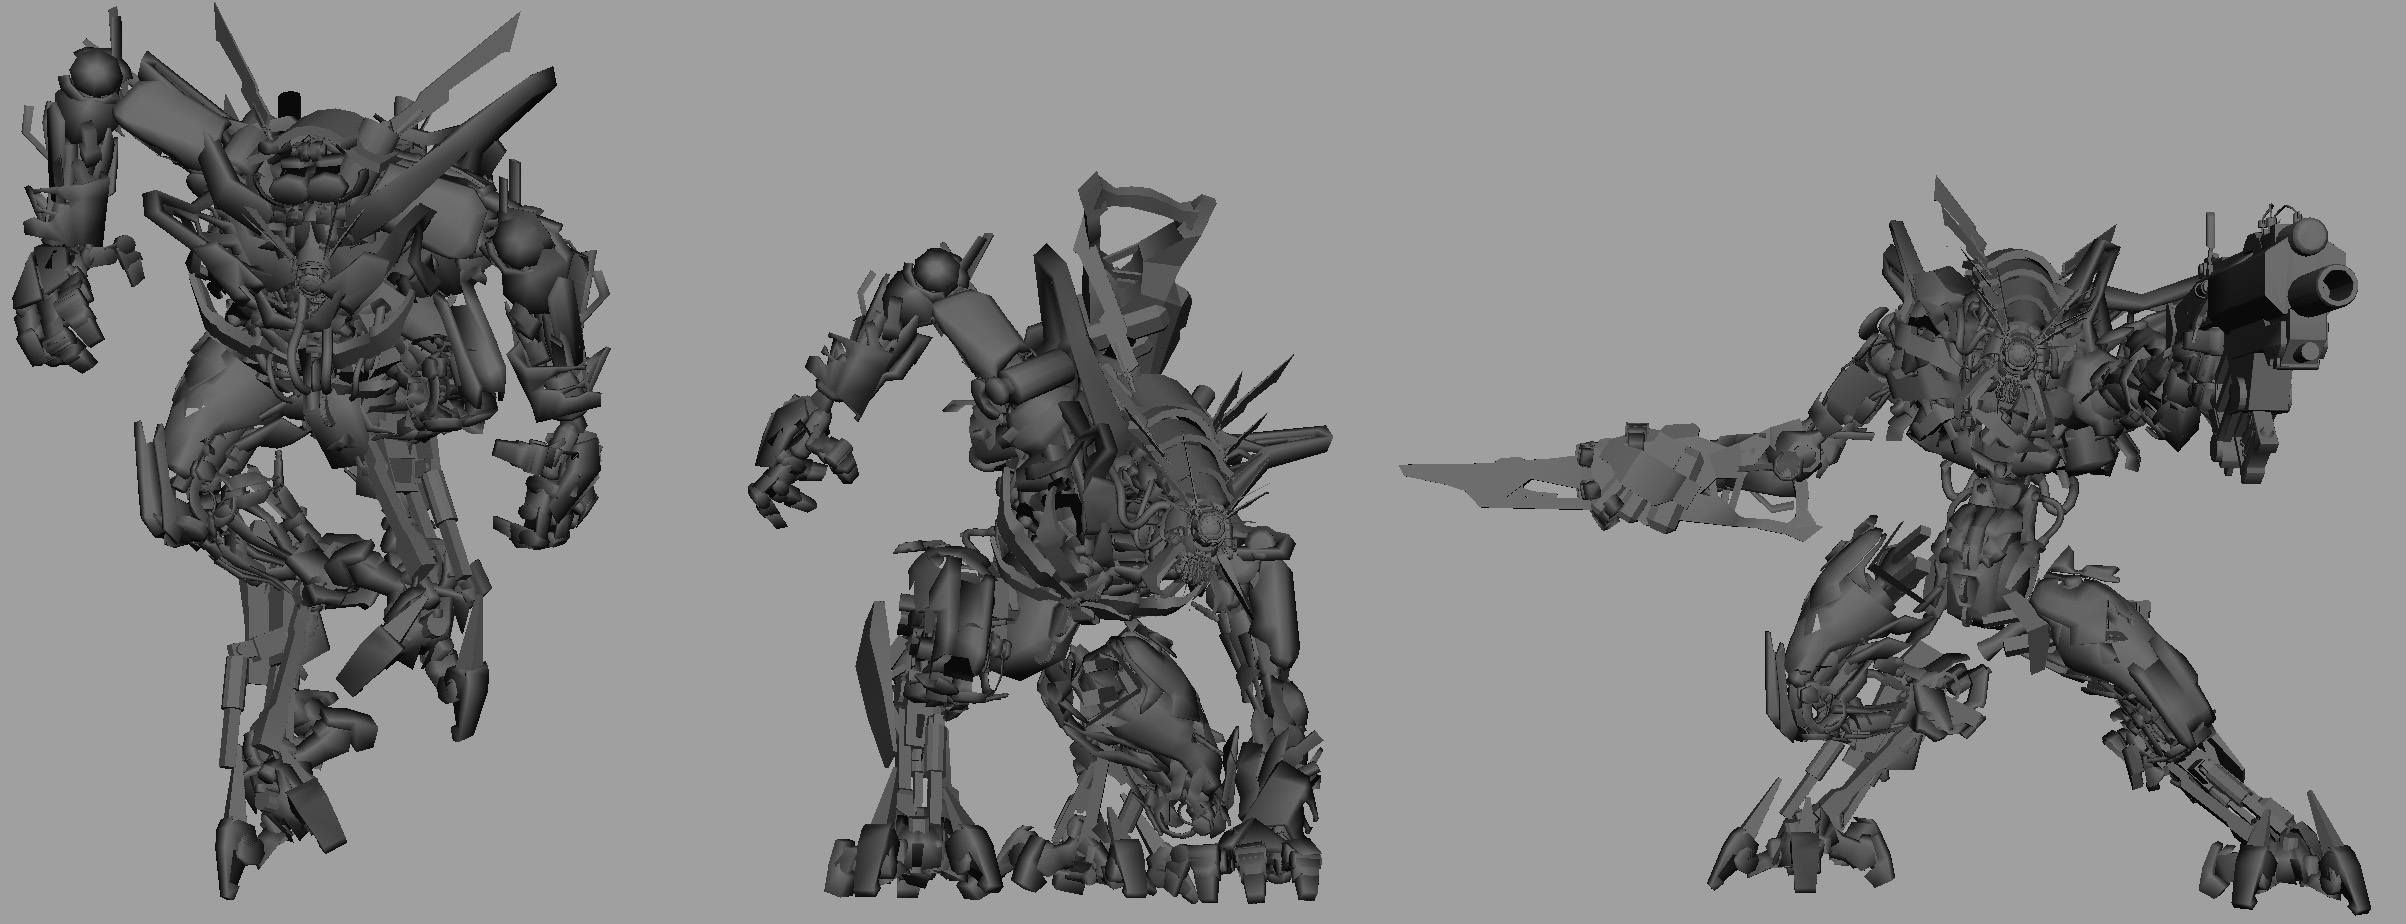
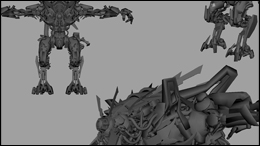
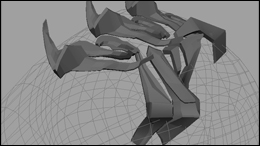
After collecting a variety of reference from existing designs, concepts and other influences, George and I started blocking out rough shapes in 3d. We took existing pieces from previous projects to use as a starting point and proxy modeled whatever new shapes were needed. While in 3d we were able to change proportions and scale quickly.
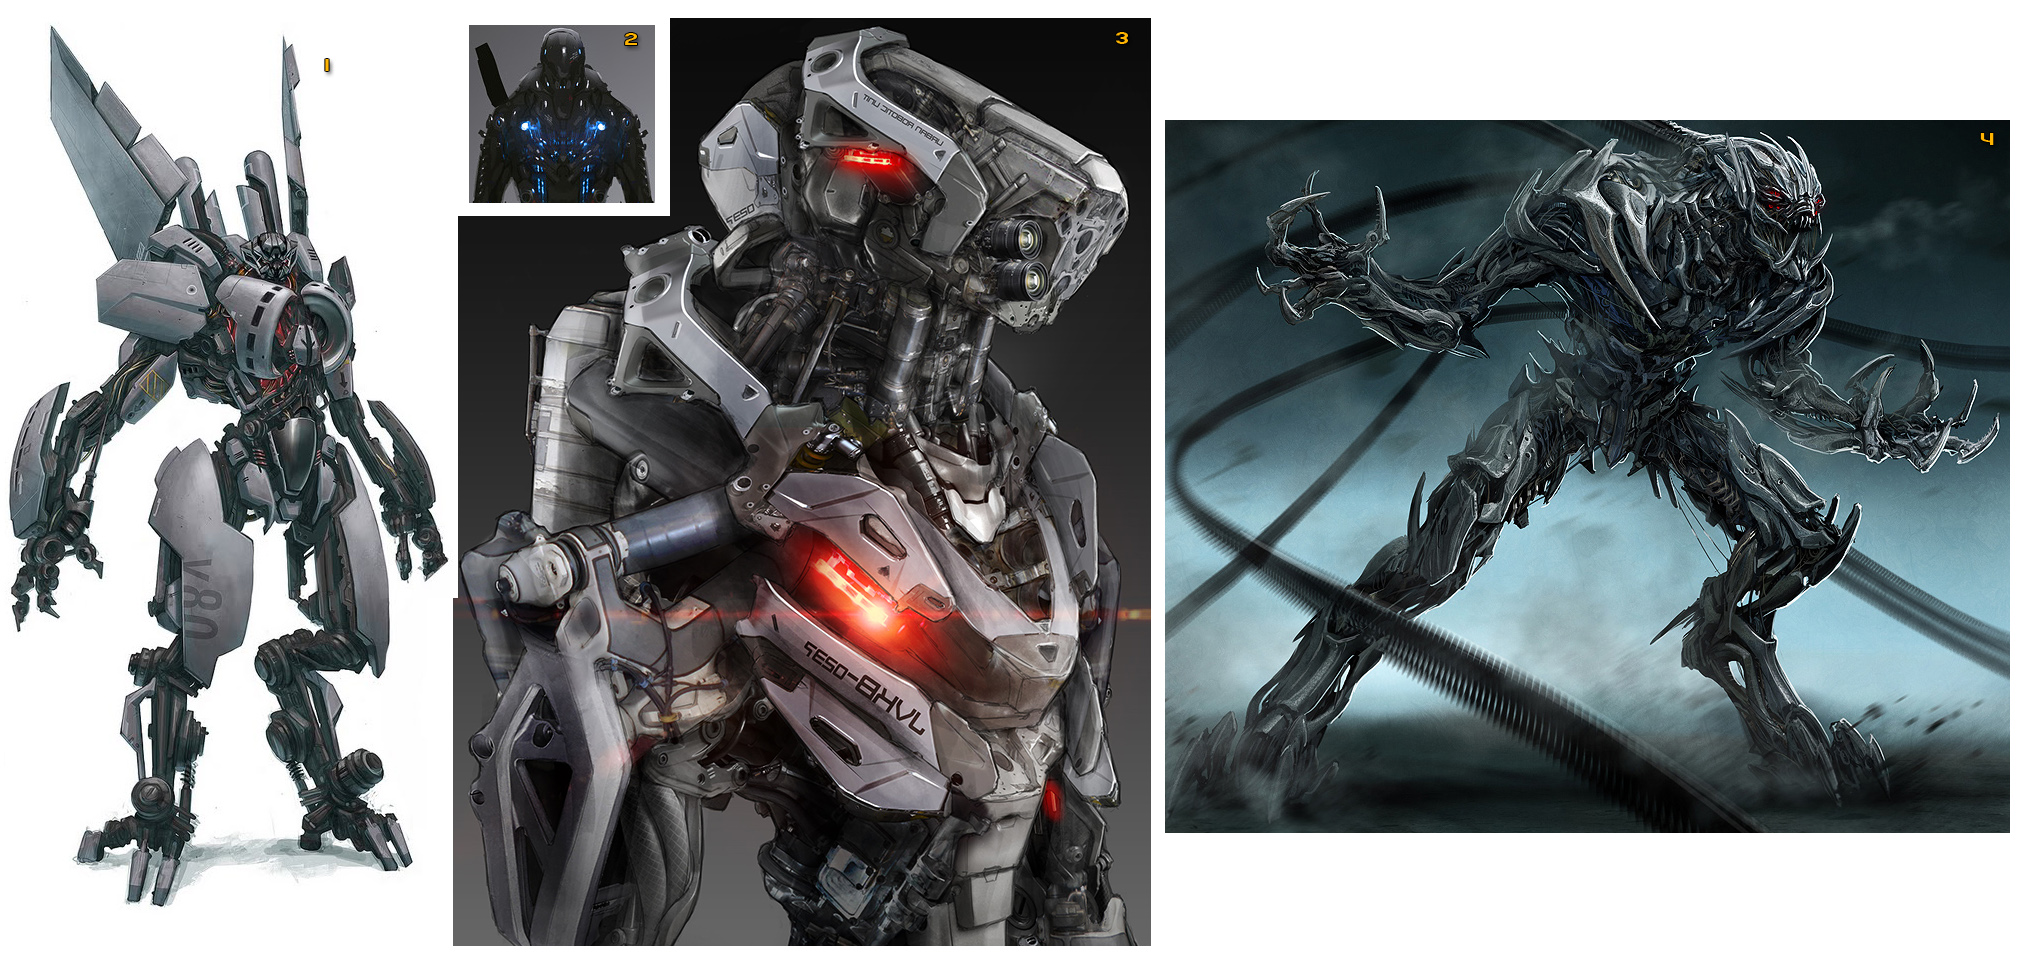
Once George and I were pleased with the general direction, we approached Justin Albers for the final design and adding the 'it' factor to make character memorable.


Justin Albers ( www.cargocollective.com/wwwjustinalbers ) : Concept Artist
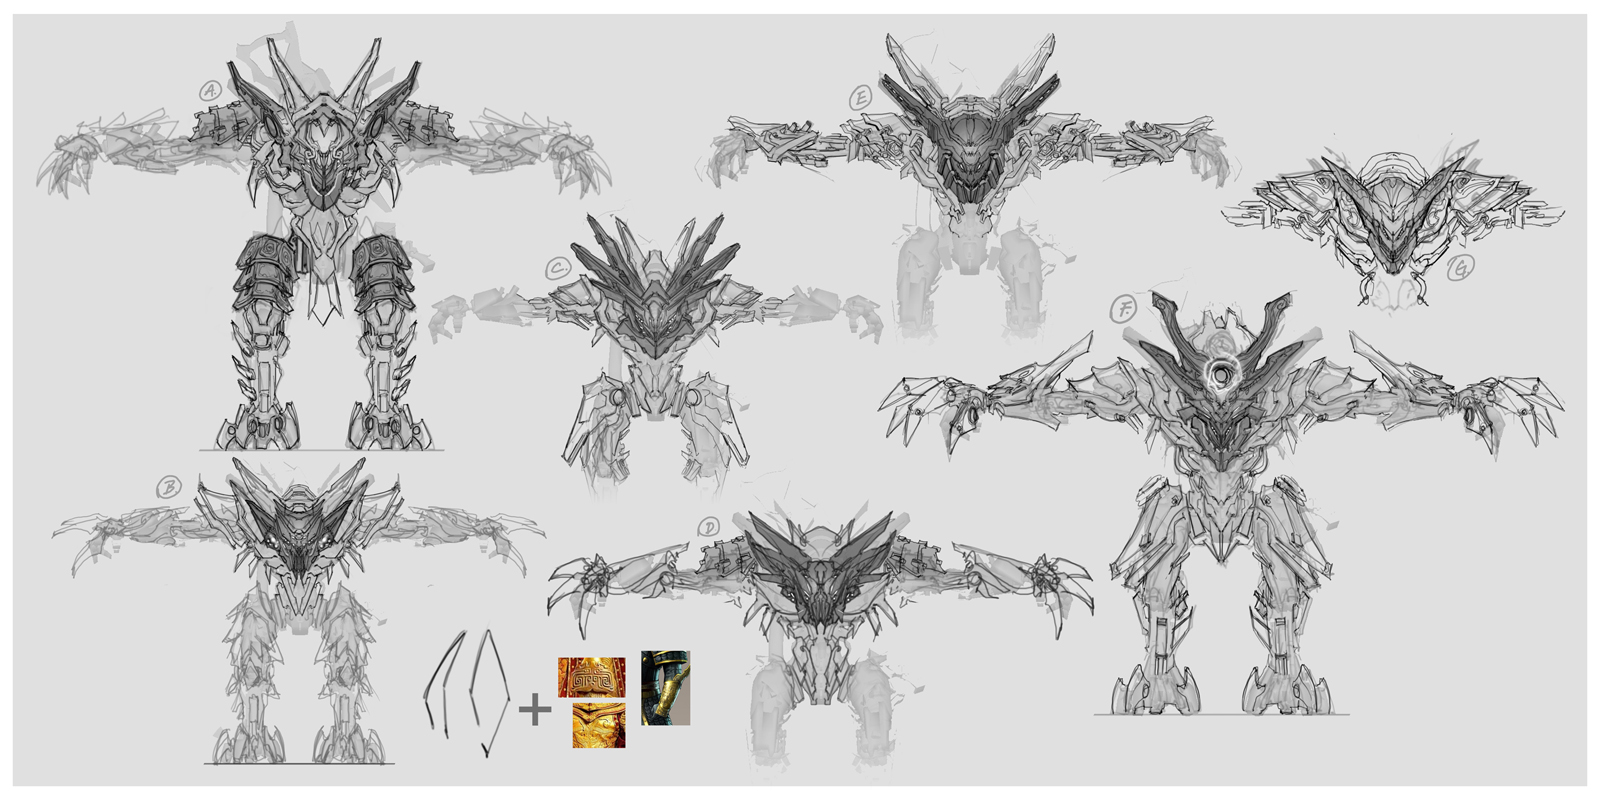
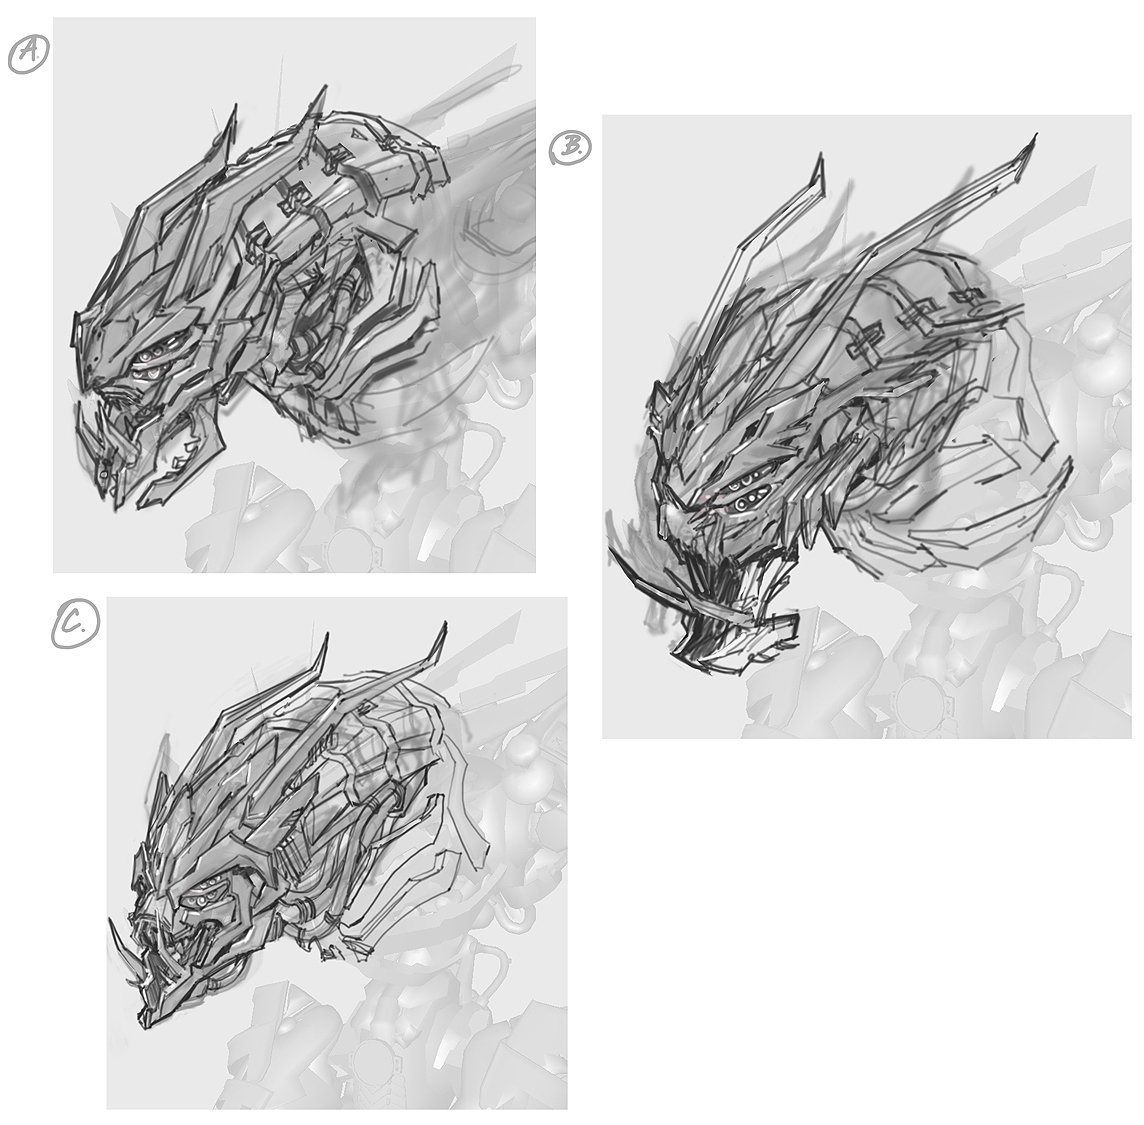
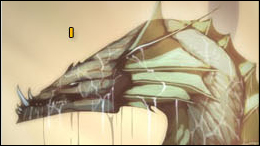
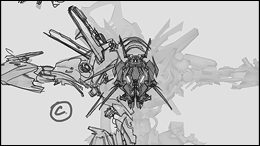
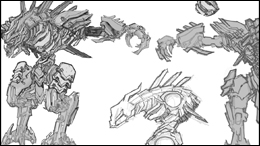
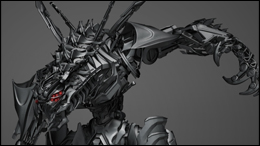
Kiel and George had a pretty solid idea of what they were looking for and gave me a great reference sheet of influences. This guy was definitely going to be sinister, menacing, sleek, and powerful - a lot of aggressive shapes and lines. We were also incorporating a bit of an insect/carapace/shell-plated look, with tons of interior mechanical detail to break up those shapes. I was referencing a lot of samurai armor as well for the shoulders and waist, trying to make him feel protected but maneuverable. Kiel also wanted there to be a lot of character in head - we paid a lot of attention to the eyes and the creepy insect mouth in order to show some expression and personality. Working over the proxy model, I did about 6-7 iterations, trying to combine all of these ideas into a cohesive design. I was trying to make sure that there was plenty of detail but at the same time have it not be so busy that nothing stood out. Working over George's model was great; I didn't have to worry about perspective, and I could just concentrate on designing. The final design for the Decepticon ended up being a combination of a lot of different parts from this initial sheet of explorations. I took the concept as far as a fairly clean line drawing - then the guys knocked it out of the park from there! It was such a great project and team and I'm very excited with how it all came together in the end.

As Justin came up with new ideas and flushing out existing ones, I would proxy model them in to the low res mesh to see how the shapes would work in 3d. One thing that became quickly apparent from his designs is that we would be changing the head from the more insect like single eye, to a more expressive and menancing design.
Modeling:
George Longo ( www.twenty100.net ) : Modeling / Design
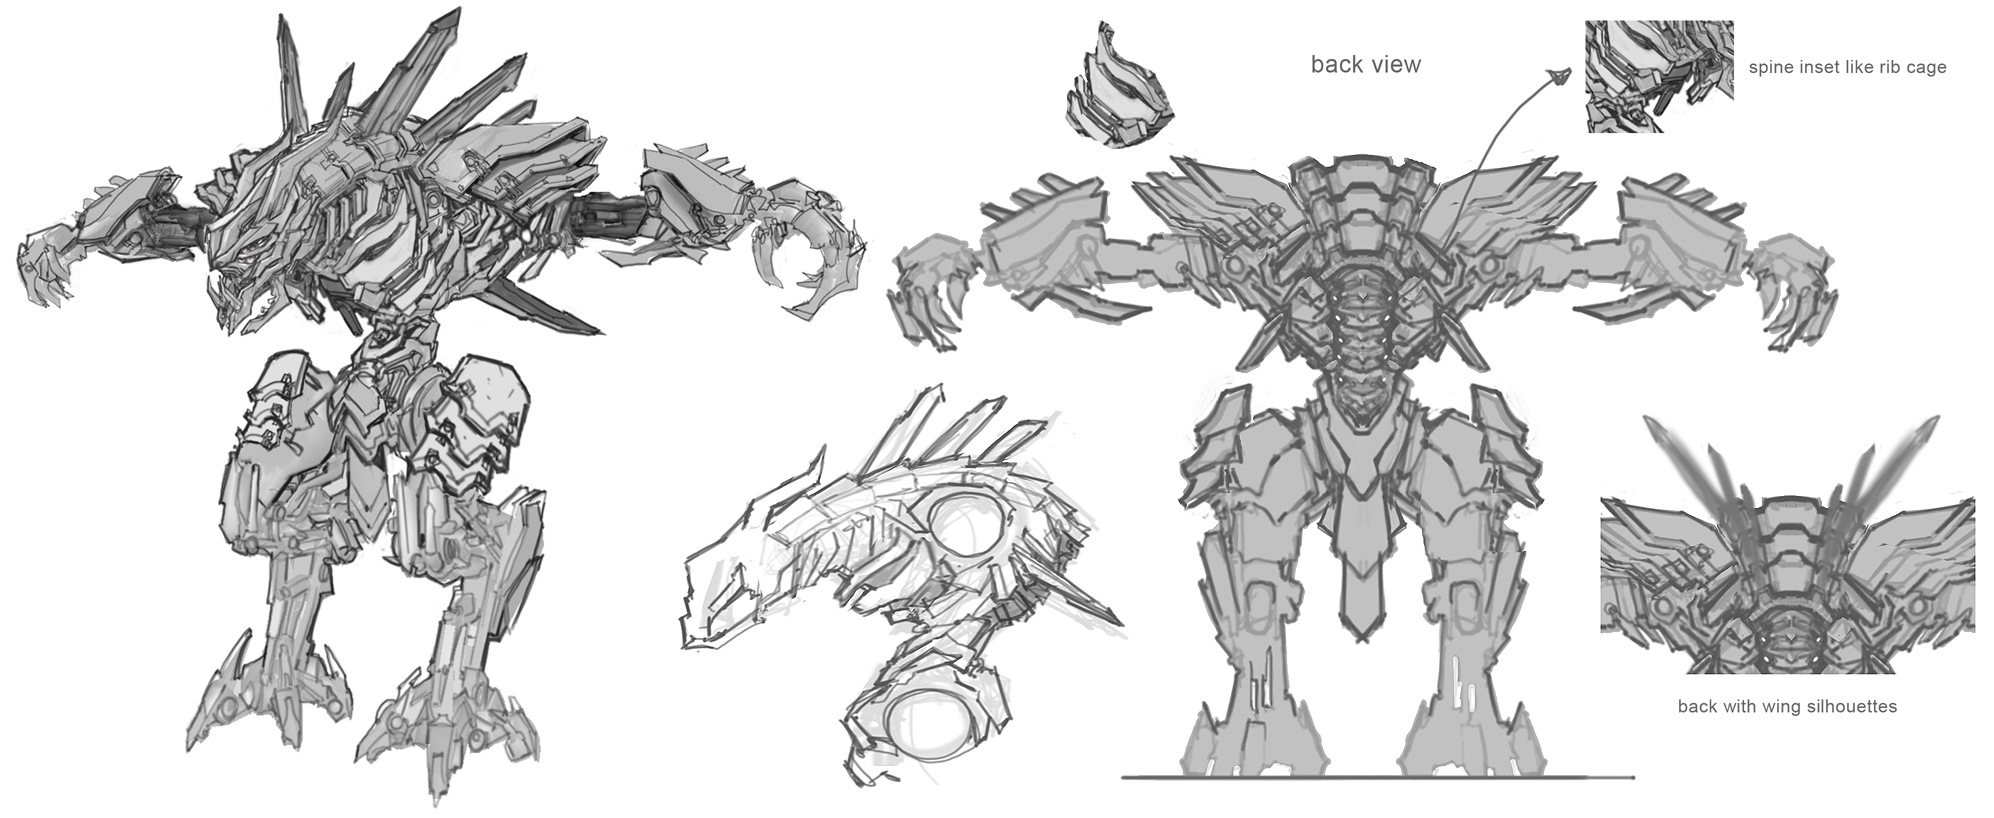
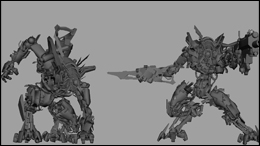
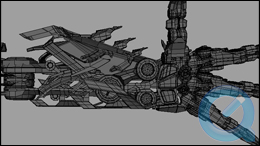
George started modeling out the full asset once the concept started shaping up. Working on the limbs and body first, while the face was being further refined in 2d by Justin. By creating smaller pieces first, and uving them as he went, he was able to build up the existing shapes from the concepts, cleanly and quickly. This helped keep the overall look of the individual pieces consistent and ready to texture as soon as they were built.
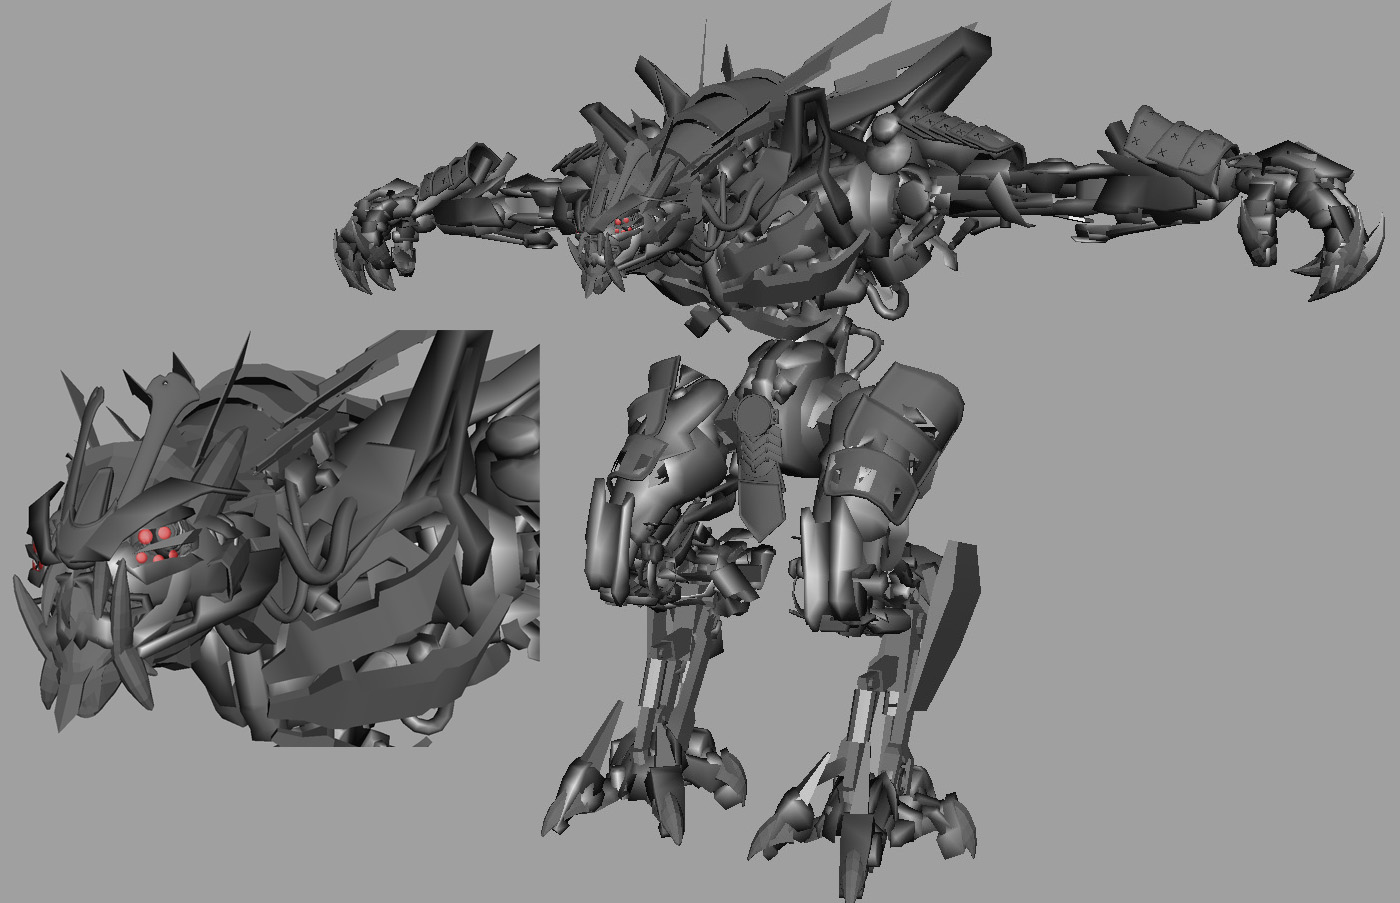
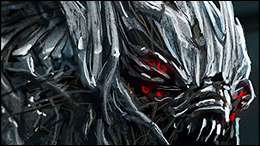
Once the final concept was created, George was able to go in and detail out the face and other facets.
Rigging:
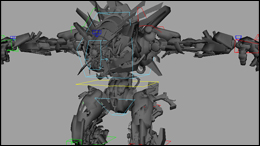
While the proxy model was being built, I was already doing various rig tests to see how the various proportions and designs would move. We'd try different lengths of limbs, layouts of pieces and other varients, trying to find the right mixture of form and function. On previous projects, I had put much more emphasis on having whatever design be particale and functional as possible, on this project we went the other direction. The directive on this character from a rigging stand point was "we'll make it work." The idea was not to limit the creativity and appeal of the designs by trying to make it work in real world. So there are pieces that don't 'do' anything, float in space or punch through others.
With the proxy model created quickly, the next step was to make sure that this character and rig could hit some of the poses we had in mind. If a pose wasn't possible, the model would get kicked back, reworked, and re rigged.
One of the early ideas was that his neck and chest were seperate. Though the idea had a lot of potential, it made for some odd visuals so was later removed. This gave way to a greater sense of weight and mass.
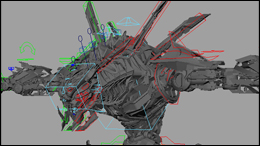
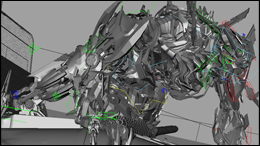
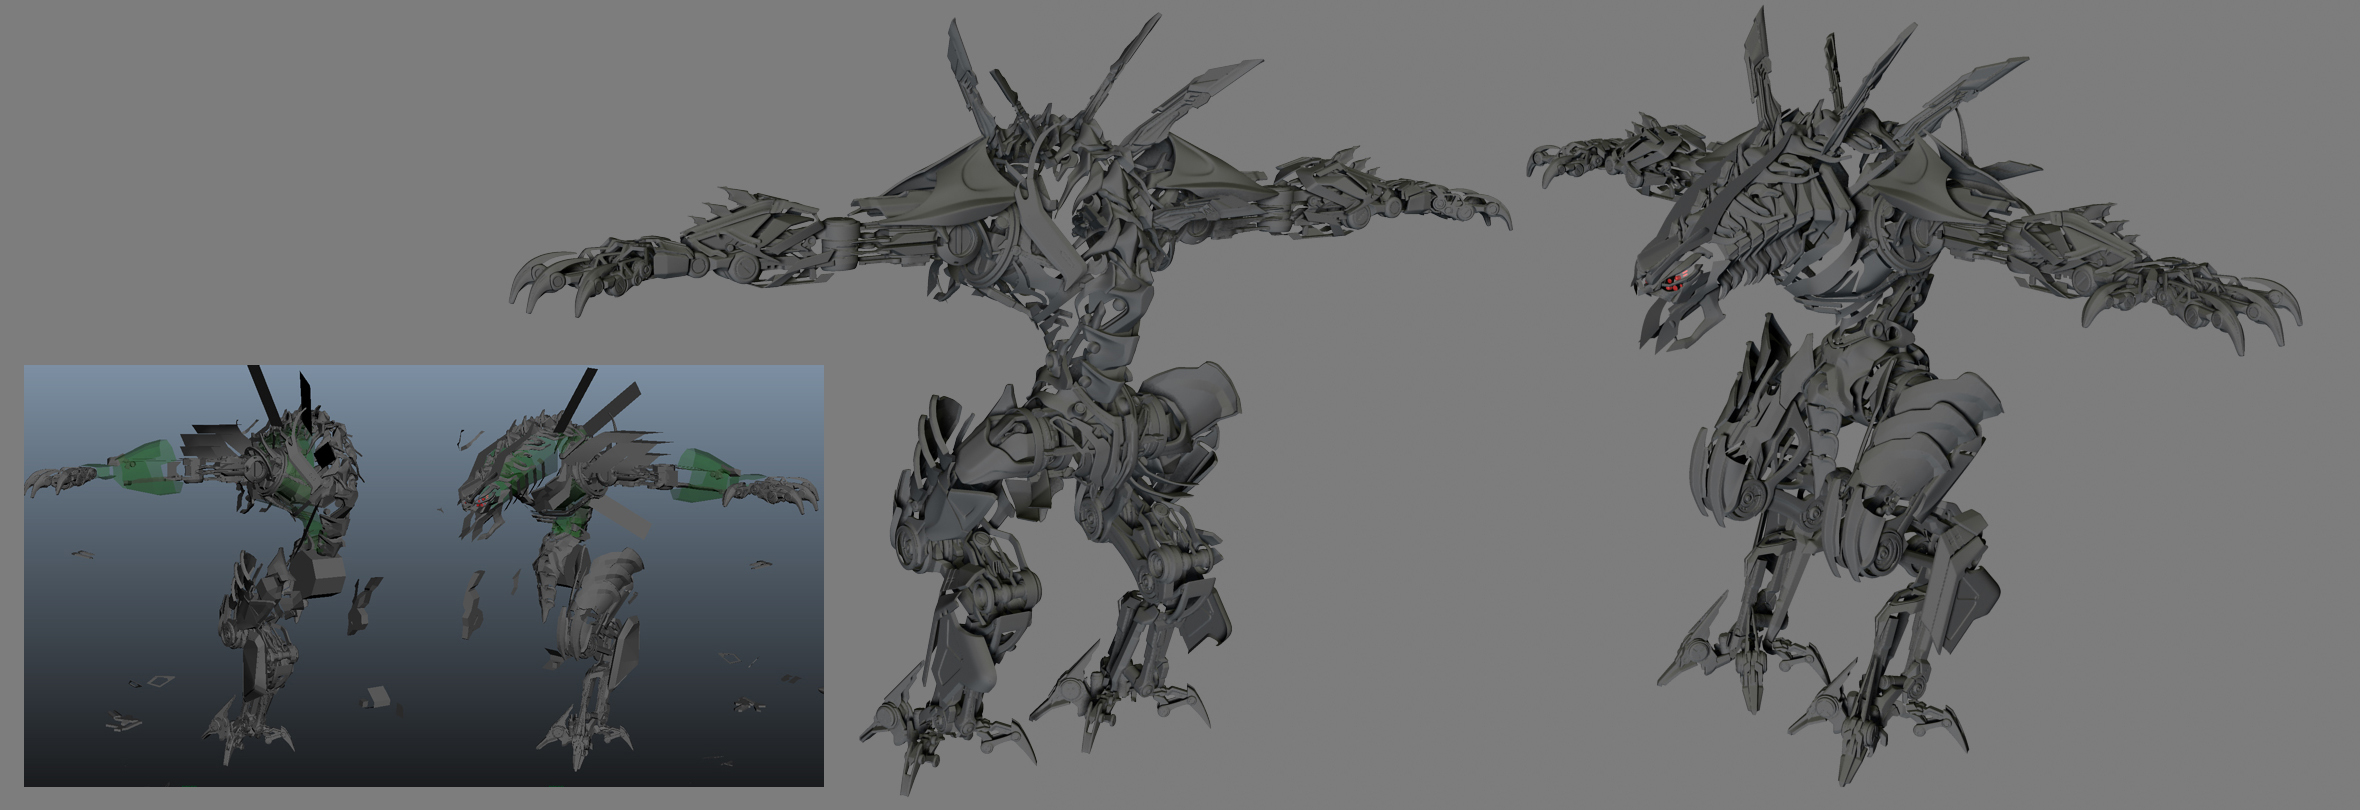
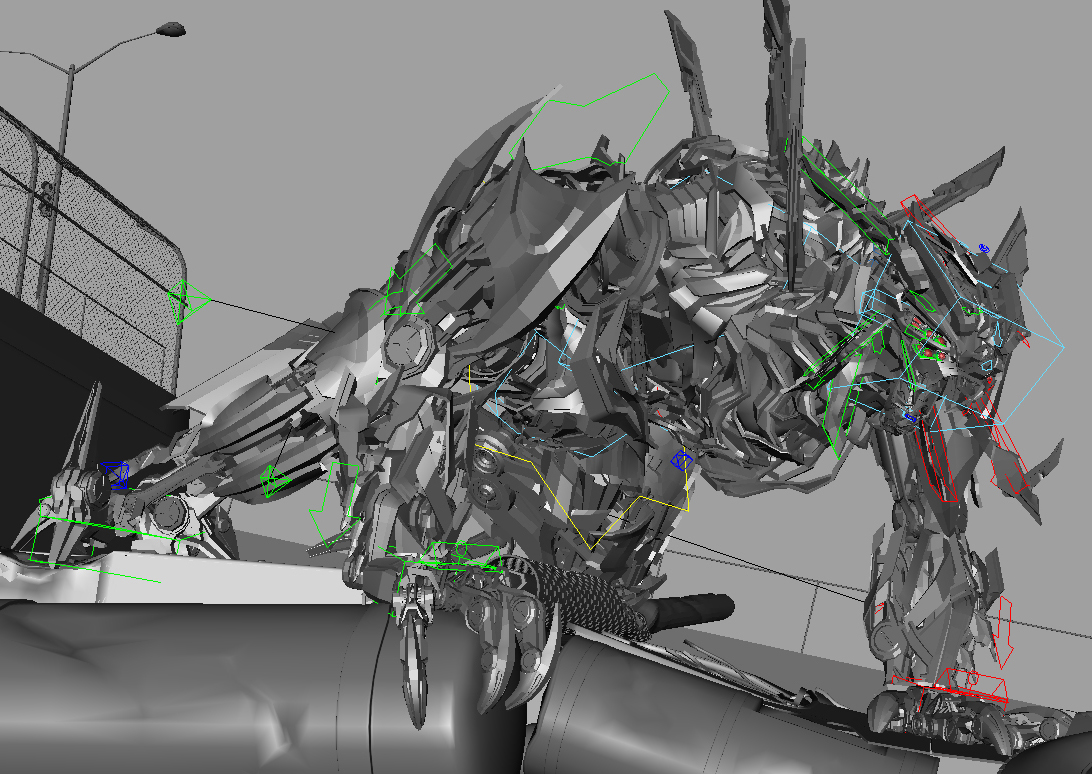
Once the final model was ready to rig, the production rig was created. The rig itself was fairly straight forward, once the core setups were created (spine, arms, legs, ect), the additional setups were layered on top and driven by the performance, hand keyed or both. The controls were built in a layered fashion, so I would only see the controls for the section I was animating, otherwise they were hidden.
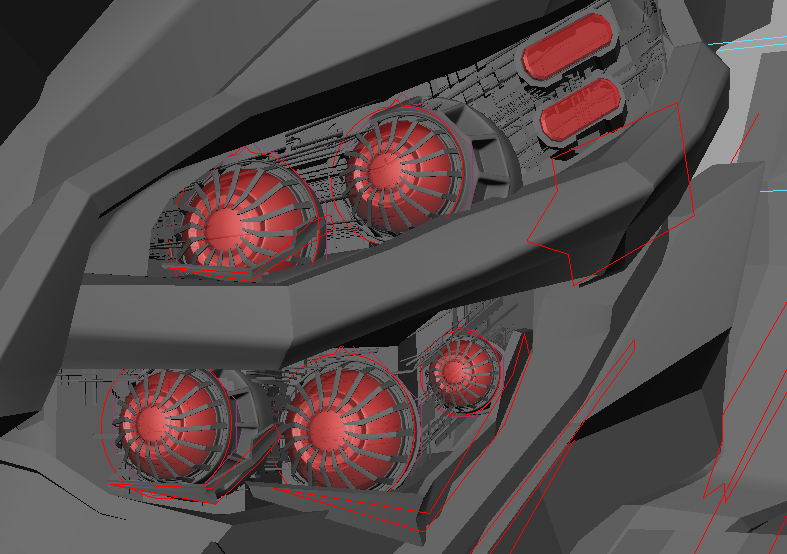
Most of the smaller, internal pieces are driven by the performance, either by a direct connection with a multipler or with a Set Driven Key setup.

For the areas that had a wider range of motion, such as the chest and neck, a diferent approach was used. Since a main goal for this character was to have all the meshes remain rigid and non deforming. This meant that pieces had to slide, lock or move into place to allow the desired range. To achieve this in high deforming areas, I created a low res mesh to act as a surface for pieces to slide on top of. As the low res surface was bound and deformed as needed, the pieces stayed riveted to their location. A per piece control was also available to fix any pentretion seen from camera if necessary.
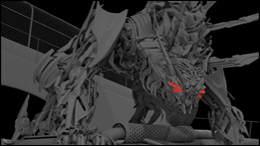
Though this was motion test was mainly from a single angle, there is more detail and setups in the rig that aren't clearly visible, such as the detail put into the eyes. In the next sequence, these details will be more clearly seen.
Through all these additional setups, the rig's file size (with the model included) remained 100mb and had real time playback in the viewport.
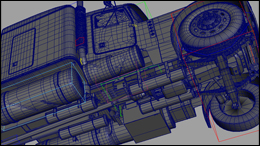
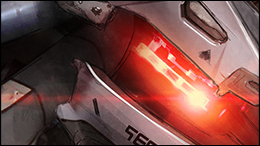
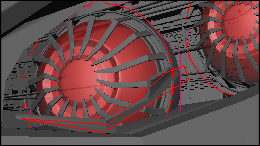
Beyond the Decepticon, there was the 18 wheeler truck he was climbing over. I couldn't think of a more appriorate vehile for a Decepticon crush.
The truck's rig was very straight forward. A few controls per section to give overall motion and offsets while smaller controls were added later as the animation progressed. The deformations of the truck was created mainly with blend shapes, were as the side mirror was hand keyed lattice points. The most noticable deformation being his knee crushing the exhuast pipe during the yell. There were several details, such as the breaking glass, under carriage gears, swaying cables and flaps that are almost impossible to see due to the lighting direction, but I'm still glad their in the shot, as I believe they add a certain level of detail that would be felt if not there.
Animation:
Animation Progression / Animation Render

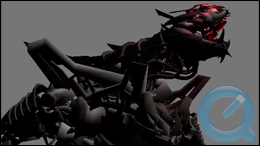
When planning the animation for this project, I really wanted to create the sense of weight that a character this size would carry. Working towards this goal, a good deal of effort went in to making smaller, faster, detailed motion to contrast the weight of the main character. These pieces included the spinning gears and driven meshes in the characters body, as well as in the environment. To really feel like this character was a part of the scene, I had him interact and change the environment, from breaking glass, crumpling the exhust pipe, side mirror and truck frame. Also, adding reactionary elements such as the truck body reacting to his weight shifts, swinging wires and spinning tires driven by the trucks motion.
The character was never intended to climb on all fours, but having him do so felt so much more animalistic and aggressive. So I wanted to at least convey the sense that he could move bipedal by how he climbs on top of the truck. He doesn't pounce like a cat would, but rather grabs with his hands, plants his foot and steps up.
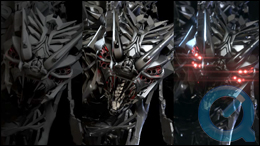
Animating his face was particularly interesting. I wanted him to have enough range to go from a very collapsed and streamlined head, and then really expand out when he yelled. To do so, we added in multiple palps around his mouth, slid his eye brows way back, and even extend his horns. There are several smaller details around his face that are unseen in this piece, mainly dealing with the eyes. They look around, blink and focus the various eyelids they have. As a very last minute addition, I felt the yell was missing something, a tongue. So I took pieces of the spine, shapes them into a serpent tongue and added it in on the last day of animation. It turned out to be one of favorite pieces of this animation as its the only fleshy and FK looking element. I think it adds a nice accent to the head and animation as a whole.
Once the performance was in a good place, I went in and flushed out the interaction with the truck. Though I had been blocking in the trucks motion since the start, now I knew exactly where the impact points where as well as the timings. Knowing this, I went in and animated the blend shapes and secondary controls. Since most of the truck elements are reactionary, the animation was pretty minimual.
Lastly, I went in and animated the finite controls on the Decepticon. Since the rig allowed for hand keyed motion atop the secondary and driven elements, I was able to create more offsets and intention with those pieces. This particular phase was actually a lot of fun, as the details keep adding more and more texture to the animation, so seeing the various leg elements lock into place, the clavicles rotating around and locking after the hand plant and even adding a bit of shake to the back spikes during the yell.
Compositing:
Joe Spano ( www.joespanovfx.com ) : Compositing
The comp for this shot posed a number of unique challenges. Because this shot is a one off, and there were no plates or reference; the shot needed to look realistic with no anchor in reality. Things like grain, black levels, defocus (focal point, f-stop, etc), lens attributes and effects, were all based on real plates and lenses to try to accomplish this. Liberties had to be taken, but every aspect is at least partially based on actual footage. The next challenge was wanting to re texture the side of the bridge to add more life and detail (and a hidden hat tip). This was done by using reference images to create the desired graffiti look, and projecting it onto the Geo from 3D. To keep the original wall's detail, I used different merge operations to correctly fit it into the scene. Another big challenge came in the way of the CG mix, and combining the CG with the Matte Painting. Again, having no plate meant there was no reference of what the color and lighting should look like. To Tackle this I broke apart the entire render into seperate passes and light sources, meaning that for every light I essentially had a seperate mix, which would all then be combined. It was a strange way of working, but the only way I could really adjust every aspect per light. In the end I think it was for the better, and it really added a great deal. The lighting became much more colorful and dynamic.