Kiel Figgins - Character Animator
Film
Broadcast
Personal
Resources
Reel
Resume
Contact
Store
Store > Support > Sword Swipe
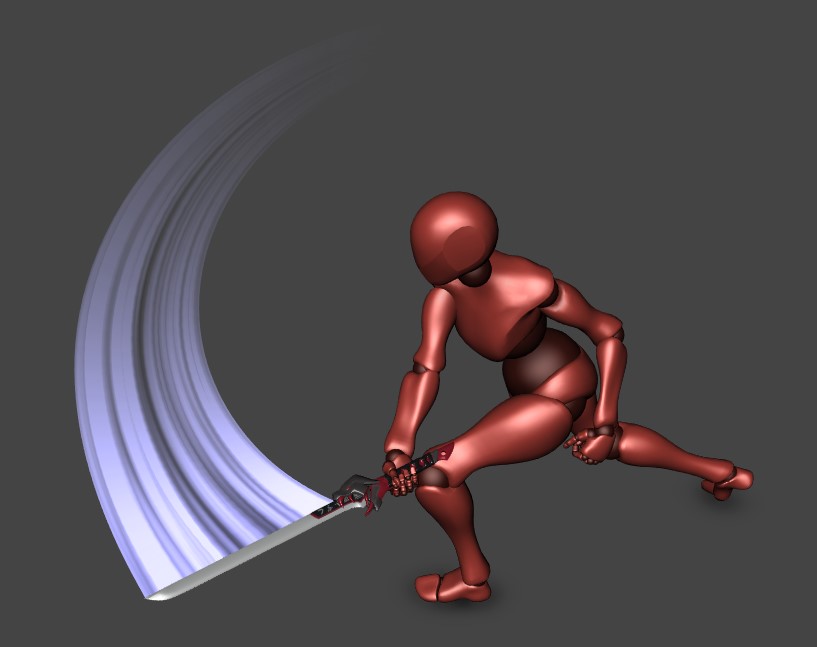
Sword Swipe with custom Flame texture (see below)
kfSwordSwipe is a Maya/MEL Tool to create a lofted nurbs surface and shader that follows the path of an object
Script Download : Script Download
Tool Breakdown : Overview on the various option in the UI
Flame Swipe Shader : Steps to create the flame shader shown above
Tron Trail : Steps to create a trail the stays in the scene
Troubleshooting : Some common issues
Other Options : Other alternatives such as a bound mesh or creating in engine
Downloading the Script
1. Download the free script HERE (Right click > Save Link As)
2. Open Maya
3. Opening the Script
1. Maya > Windows > General Editors > Script Editor
2. Script Editor > History > [x] Suppress Duplicate Variable Messages
3. Script Editor > File > Source Script... , Locate the kfSwordSwipe.mel file, select it and click 'Open'
4. Script Editor > MEL Tab, type the following mel command:
kfSwordSwipe();
4. Script Editor > MEL Tab, press enter to run the command
5. A new UI should pop up, feel free to close the Script Editor
Tool Breakdown
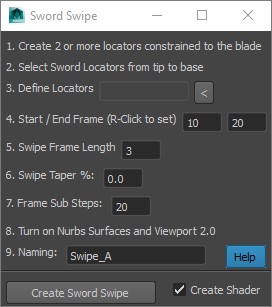
With the tool now open, you'll want to do the following:
1. Create two or more locators and align them to the edge of the your sword's blade. If the blade is straight two should be fine, if it's curved you can create more locators.
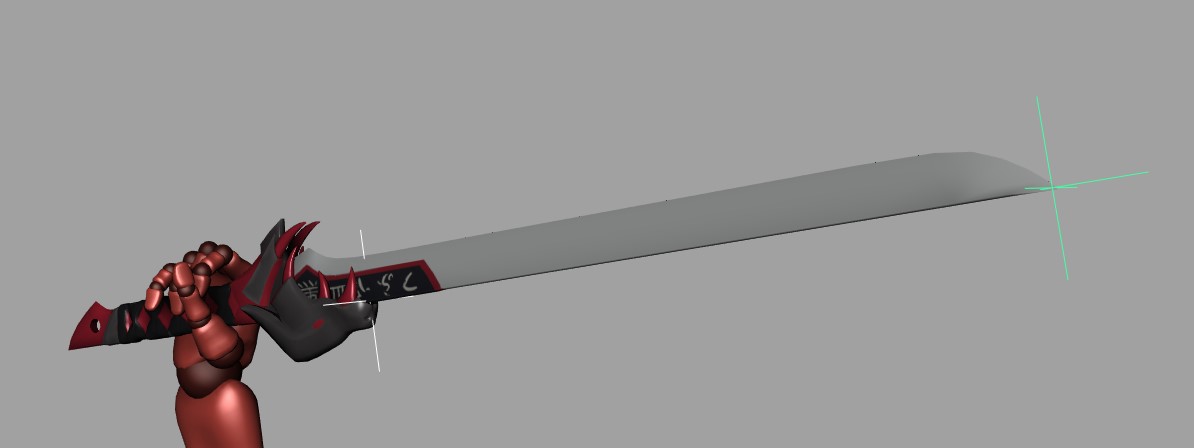
Two Locators constrained to blade
2. Once happy with the locators, select them in order from tip to base
3. Click the [<] button to then define your locators
4. Set your start and end frames for the swipe. You can right click in the number fields to set them to the current frame of the timeline
5. Set the length of the swipe for how long it will last. It might take a few tries to get this and other settings dialed in
6. Set the swipe taper amount. This means how much the end tip pinches into a point. 0 is no pinching, 100 is full pinch.
7. Set the frame sub steps. In most cases 20 should be fine, but if your swipe is really long or really fast, you may need to up this value to get a smooth arc
8. Turn on nurbs surfaces in your viewport and set your viewport to 2.0
9. Give your swipe a name. This allows you to create multiple swipes in the same scene
10. Create shader creates and assigns a maya shader to the swipe, can be handy if you don't want to build your own.
Default swipe shader with 100% taper
11. You can adjuste the shader to change the color of the swipe by selecting the swipe mesh and changing the Ambient Color of the shader
Changing the color of the swipe
Flame Swipe Shader
1. Using the free flame texture from NicePng, or download here Fire Texture
2. Create the swipe setup in your scene
3. Select the swipe mesh
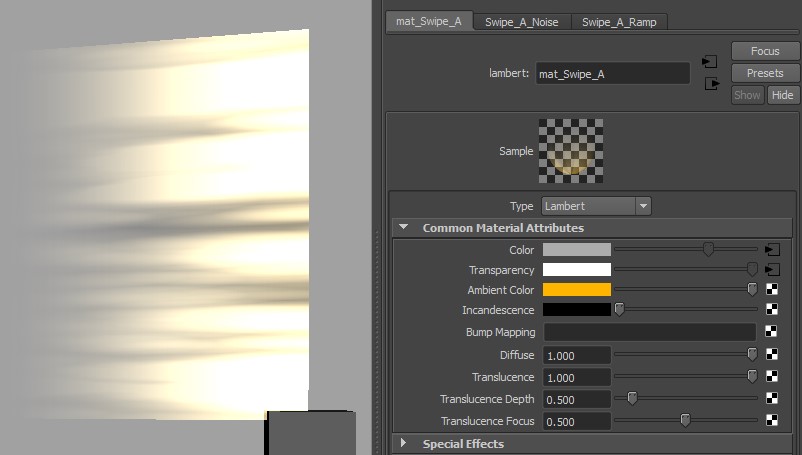
4. Assign a new lambert shader to the mesh, called mat_Flame
5. Assign a file texture to the color of mat_Flame, map the file to your flame texture
6. A new 'place2dTexture' node is created, select that in the Attribute Editor, set the rotate frame to 270 and the coverage to 1.01
7. Repeat steps 5 and 6, only this time, mapping the file to mat_Flame's incandescene color
8. On mat_Flame, set the Ambient Color to .5 (mid gray), and Difuse and Transluence to 1
9. On mat_Flame, click the [>] button next to Transparency, this should bring you to the file node in the Attribute Editor
10. Expand Color Balance in the list below, click the checker box next to Alpha Gain
11. Map a ramp node to this swatch
12. In the newly created ramp node:
Delete the middle ramp slider (typically green) by clicking the square x
Set type to U Ramp
Set Interpolation to Exponentail Up
Adjust the ramp's remaining colors so it's black at the bottom and white at the top
13. Lastly, to complete the look in the example, I created a point light constrained to the sword and animated the color and intensity during the swipe
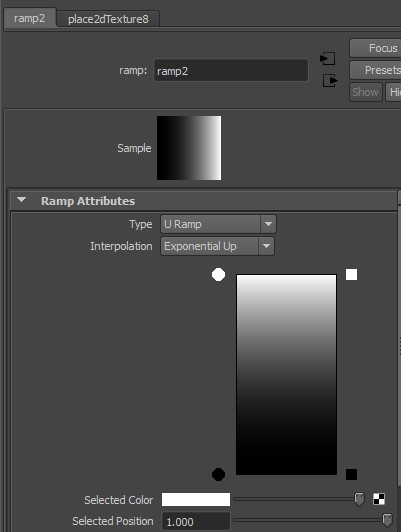
Final Ramp Shader settings
Tron Trail
**NOTE** - this setup is kind of a hack and the results aren't always perfect, but you get something that might work...
With the tool now open, you'll want to do the following:
1. Set Start and end frame to the length of the timeline
2. Set the Frame Length to the number of frames of the timeline
3. Set the Frame Sub Steps to twice the number of frames in the timeline (or more to make trail even more accurate)
4. Create four, or more locators to make a profile shape (like a square), group the locators and constrain them to the wheel
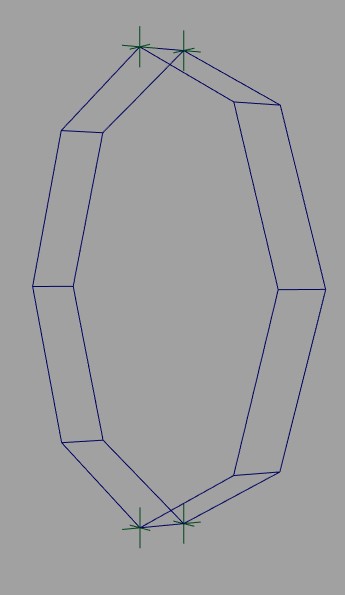
4 locators to create the trail profile
5. Set Swipe taper % to 0
6. Uncheck Create Shader
7. Create the Swipe, it will take a while to run through
8. Select the loft mesh and in the loft attributes and set the degree to linear, close On

Tron Trail end results
Troubleshooting
1. Sometimes viewport Anti Alias causes a small flicker at the end of the tail, turning off anti aliasing should resolve this.
2. Viewport Ambient Occlusion causes one side of the loft to go dark, turning off Ambient Occlusion should resolve this.
3. If the locators are too close or too far apart the loft might get a warped. Try selecting the loft mesh and in the channelbox changing the loft1.degree to linear
4. Tron trails can shimmer a bit as the trail gets longer. It's not always noticable in the scene depending on the camera, but it does happen. You can increase the number of sub frames and recreate the trail for better results.
5. Creating Tron trails can lag/crash with too many sub steps. I've had better results creating a single trail in a clean scene and bringing in the results into the main scene if multiple are needed.
Other Options
This approach creates a nurbs surface so it isn't able to export to a game engine. Below you can find some other options like creating it with a bound mesh or directly in a game engine. Though to be fair, its such a common in game element, multiple tutorials and assets packs exist and should show up with a google search.
Building in Unity
Building in Unreal