Kiel Figgins - Character Animator
Film
Broadcast
Personal
Resources
Reel
Resume
Contact
Store
Store > Support > Spiderman Web Rig
Amazing Spiderman Web Rig Overview
Here's a quick overview on how to get the most out of the free AnimRig of the Amazing Spiderman and his web rig
Connecting Web rig to Spiderman : Steps on creating the default connections between Spiderman and the Web rig
Connecting Web rig to AnimRigs : Steps to attach the web rig to other AnimRigs from 3dFiggins.com/Store
Connecting Web rig to custom rigs : Steps to attach the web rig to any referenced rig or connection points
Overview on the Web rig setup : Overview of the web rig setup, controls and channels
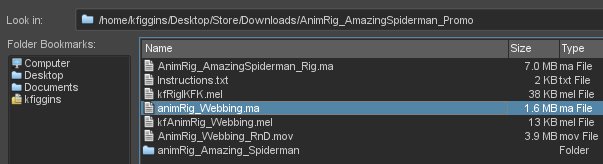
1. Download the Amazing Spiderman rig Here (or just the web rig and attach script Here (Right click > Save Link As))
2. Head over to the Quick Start Guide to remap the textures and get familiar with the core rig
3. Reference the AnimRig_AmazingSpiderman_Rig.ma into a new scene (these steps are covered in the Quick Start Guide)
4. Now that he's referenced in, you're good to start animating
Connecting the Web Rig to the Amazing Spiderman AnimRig
1. Reference the AnimRig_AmazingSpiderman_Rig.ma into your scene (these steps are covered in the Quick Start Guide)
2. Make sure the animRig_Webbing.ma is in the same directory as AnimRig_AmazingSpiderman_Rig.ma
3. Opening the Script
1. Maya > Windows > General Editors > Script Editor
2. Script Editor > History > Suppress Duplicate Variable Messages (For Maya 2015 onward)
3. Script Editor > File > Source Script > Locate kfAnimRig_Webbing.mel from the unzipped directory, select it and click 'Open'
4. A new UI should pop up, feel free to close the Script Editor
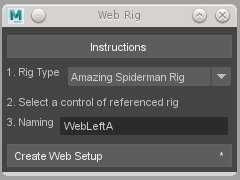
4. Select 'Amazing Spiderman Rig' from the number 1 dropdown
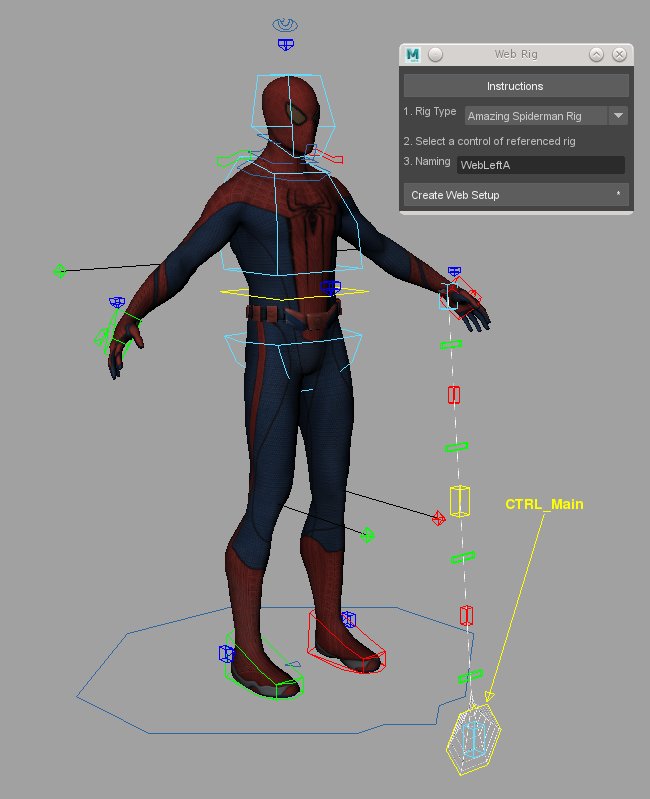
5. Select a control on the referenced Spiderman rig, provide a name of the web in number 3, then click 'Create Web Setup'
Connecting the Web Rig to an AnimRig
1. Reference the AnimRig into your scene (these steps are covered in the Quick Start Guide)
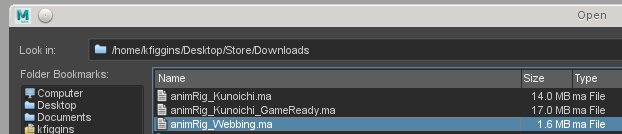
2. Make sure the animRig_Webbing.ma is in the same directory as the AnimRig
3. Opening the Script
1. Maya > Windows > General Editors > Script Editor
2. Script Editor > History > Suppress Duplicate Variable Messages (For Maya 2015 onward)
3. Script Editor > File > Source Script > Locate kfAnimRig_Webbing.mel from the unzipped directory, select it and click 'Open'
4. A new UI should pop up, feel free to close the Script Editor
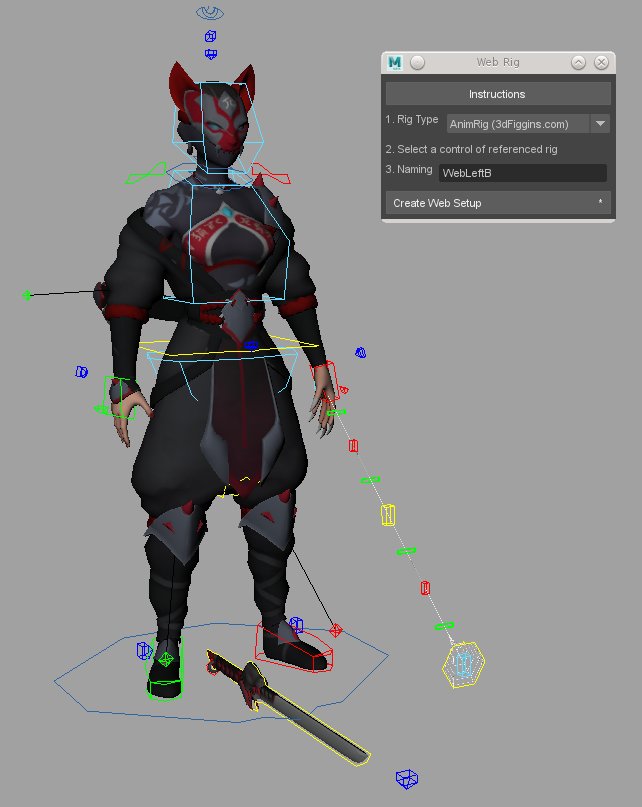
4. Select 'AnimRig (3dFiggins.com)' from the number 1 dropdown
5. Select a control on the referenced AnimRig, provide a name of the web in number 3, then click 'Create Web Setup'
Connecting the Web Rig to a custom rig or selection
1. Reference the custom rig into your scene (these steps are covered in the Quick Start Guide)
2. Make sure the animRig_Webbing.ma is in the same directory as the custom rig
3. Opening the Script
1. Maya > Windows > General Editors > Script Editor
2. Script Editor > History > Suppress Duplicate Variable Messages (For Maya 2015 onward)
3. Script Editor > File > Source Script > Locate kfAnimRig_Webbing.mel from the unzipped directory, select it and click 'Open'
4. A new UI should pop up, feel free to close the Script Editor
4. Select 'Selected Controls' from the number 1 dropdown
5. Select 3 controls on the referenced custom rig
**The script attaches the Web Rig to the selection in order, so L Wrist, R Wrist, World Control
6. Provide a name of the web in number 3, then click 'Create Web Setup'
This same process could be used to connect the webs to different points on the Spiderman Rig or other AnimRigs, by selected those controls in order and repeating this process.
Web Rig Overview
1. Providing a new name in the UI will allow you to bring in multiple web rigs, namings such as web1, web2, etc
2. On the newly created and referenced web rig, the control WebLeftA:CTRL_Stick should be selected (Yellow octogon as the base)
1. Move this to where you want the web to stick
2. Channel Breakdown
Mesh Vis : toggle the web mesh
Web Shoot : 0 retracts the web to the shooter, 1 is fully stuck to base
Web Thickness : controls the radius of the web strands
Strand Density Length : on a very intricate curve shape of the web the polygons might look faceted, increase this number to smooth them out
Strand Density Width : increases the edge count to make the radius smoother
Web Stick Splay : 0 removes the impact cross webbing, 1 shows the full impact to the CTRL_Stick
Splay Spread : tightens the angle of the impact spread
Web Base Pinning : dropdown to attach the web to various parts of the spiderman rig
IKFK : blends between the default strand and a reverse FK chain from the impact Control. Note that you'll need to turn on the Rev FK Vis channel to show the FK Controls
IK Constrain World : locks strands controls into world space
Main Strand Vis : toggles visiblity of primary controls
Main Strand Micro Vis : toggles visiblity of sub controls to give a more precise curve shape
Strand A - F MicroVis : toggles the per strand sub controls