Rendering in Arnold for Animators
Kiel Figgins - 3dFiggins.com
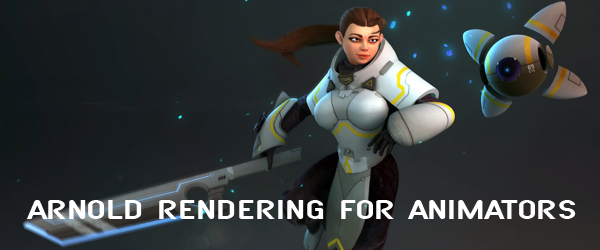
Creating a fun animation is great, but sometimes you want some solid renders to go with it. This tutorial covers setting up the shaders from scratch in Arnold, so with that in mind, lets get started!
This tutorial was written by:
Erin Donahue
@erindeIIe
erindonahueart.com
A big thanks to Erin for all her help providing this content!
Rig available at 3dFiggins.com/Store
Miko model by Brandon Bennett
Overview
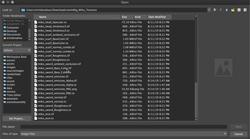
Open up the rig file and take a look at the textures in the folder. You'll see that there are 10 respective texture sets, or texture map images that correspond with 10 different sets of Miko's mesh. These are:
Sword textures
Scarf textures
Head textures
Hair textures
Gribles textures
Clothes textures
Armor textures
Eyes textures
Eyebot textures
Text textures
In this tutorial I'll cover the specific setup process for each of these texture sets, because while most of them follow the exact same steps, some of them have additional maps to plug in. Here's how you can set these texture sets up with their respective textures using aiStandardSurface shaders in Arnold for Maya. Before we begin, it's wise to create a skydome light in your scene so that you can periodically check how your shaders look in the Arnold Renderview. This can be deleted after setup.
Miko comes with pre-assigned shaders ending with _mat. We can delete these shaders from within the Hypershade so that we're starting fresh.
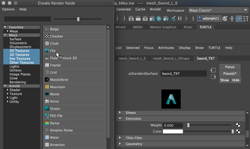
SWORD
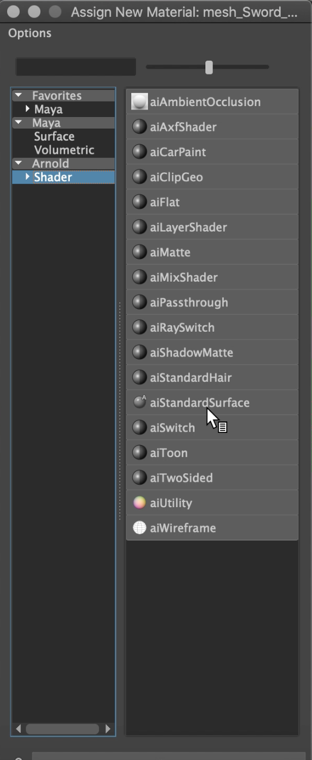
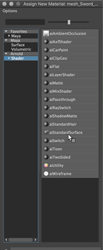
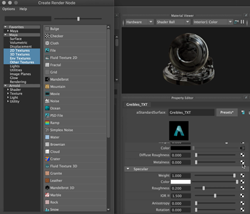
First, to set up Miko's sword, select the sword geometry. Right click and drag your cursor down to select "assign new material". From the materials given, select Arnold shader, and in that dropdown, select aiStandardSurface. This will assign an aiStandardSurface shader to the mesh.

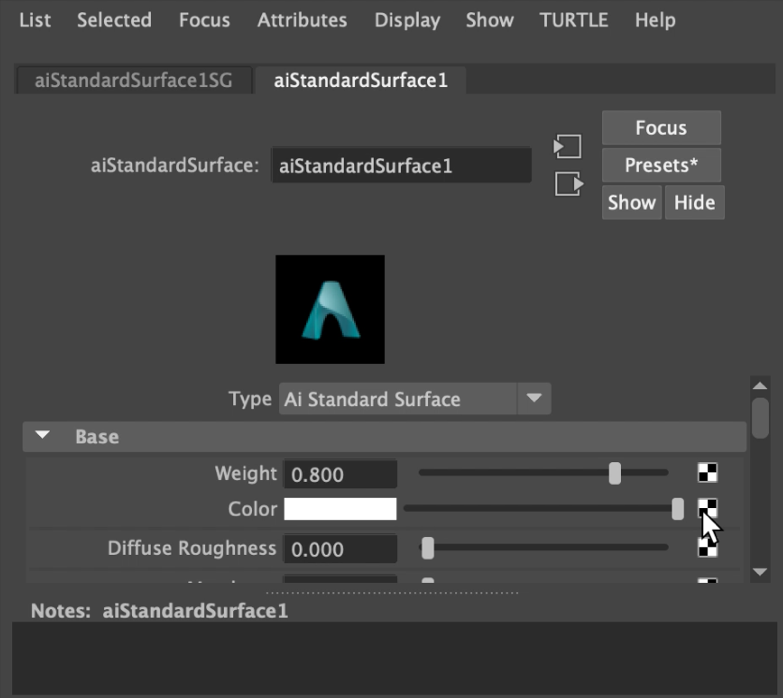
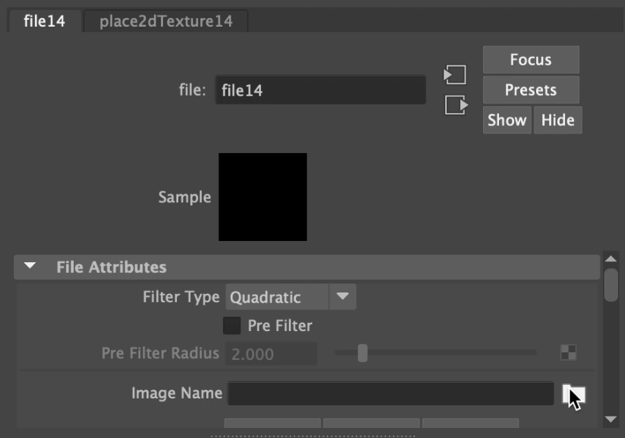
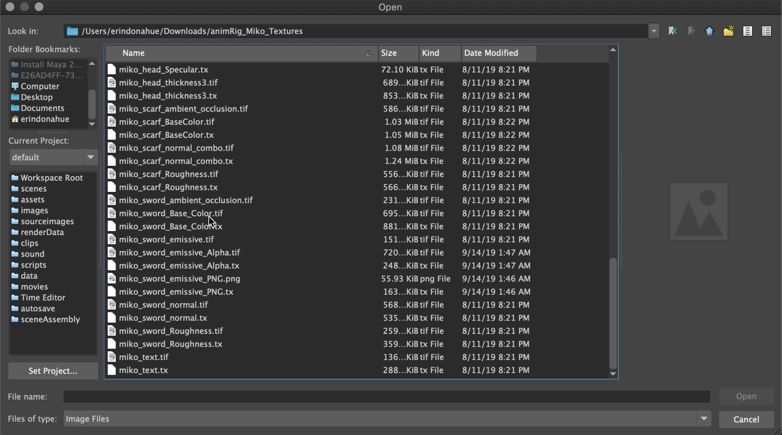
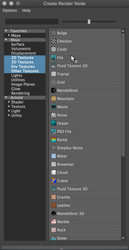
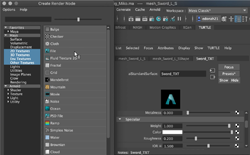
Then, in the Attribute Editor, you'll see the default attributes for the new aiStandardSurface shader. Click on the checkerboard to the right of Base Color, click on the file node in the Create Render Node dropdown, click on the folder icon to the right of Image Name in the file node, and choose miko_sword_Base_Color.tif.


Next, follow the process outlined above to assign the miko_sword_Roughness.tif image to the Specular Roughness node.
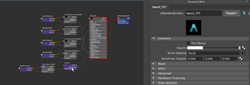
Since the sword has emission, we'll have to scroll down in the Attribute Editor and click on the Emission dropdown. Under Emission Color, assign the miko_sword_emissive_PNG.png image and under Emission Weight, assign the miko_sword_emissive_Alpha.tif image.
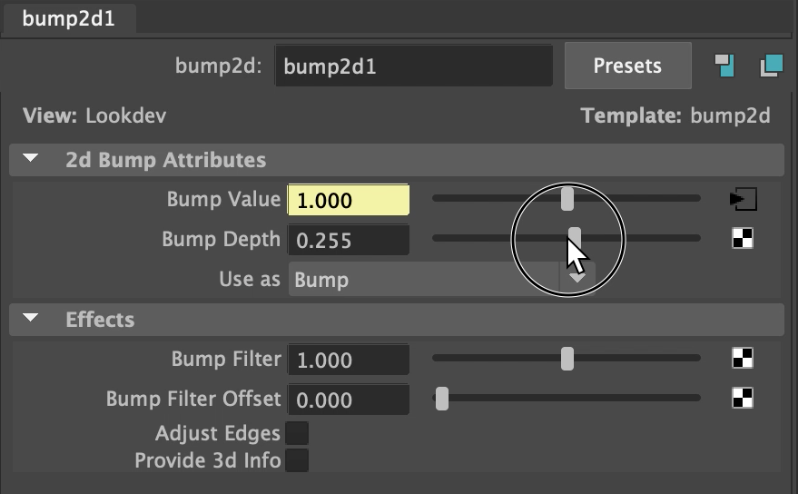
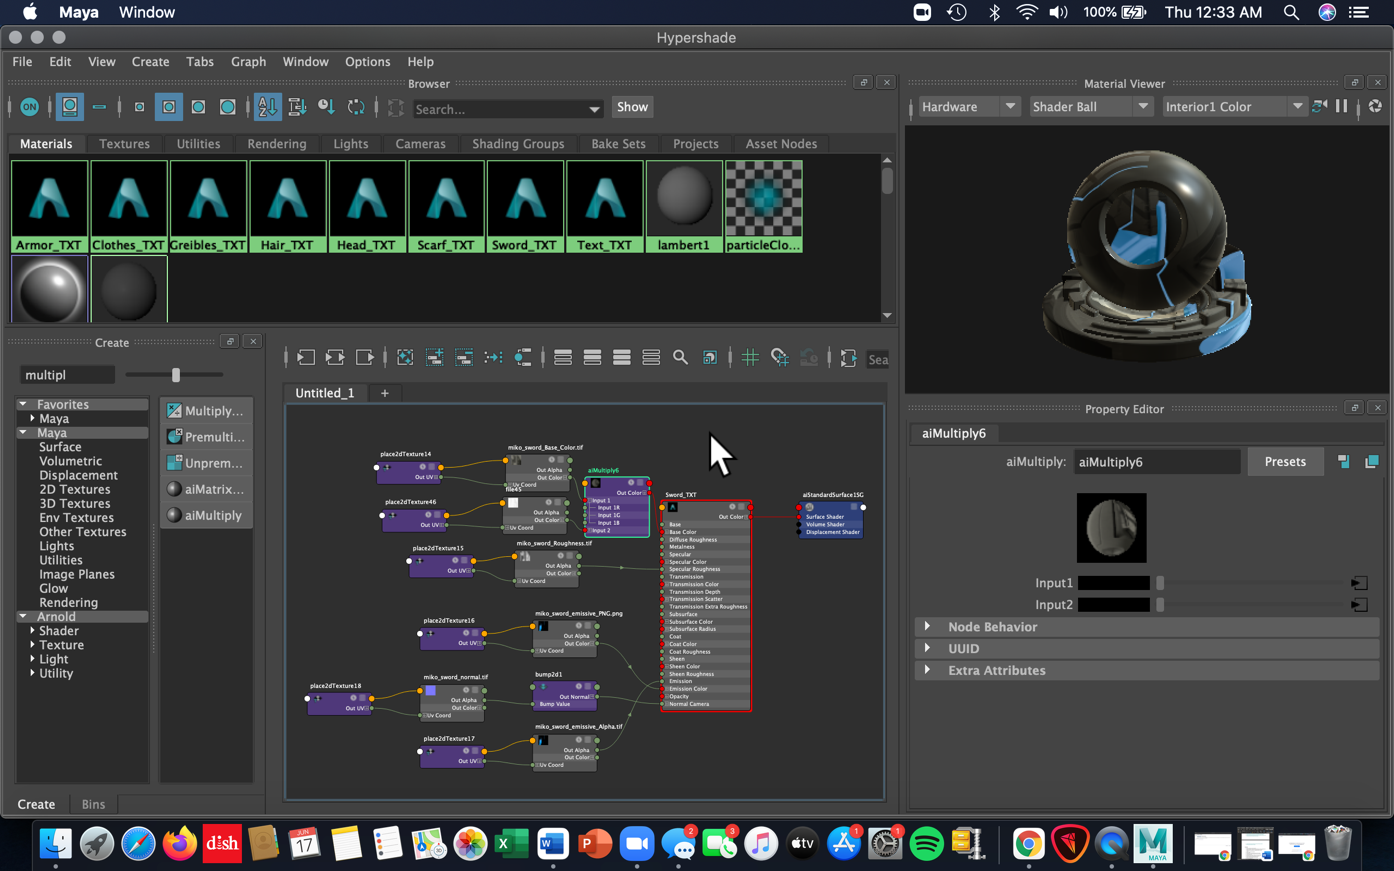
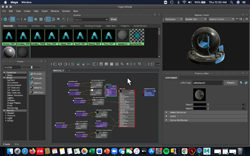
Then, scroll down in the attribute editor and click on Geometry. Click on the checkerboard to the right of Bump Mapping, click on file, and next to Bump Value click on the arrow. Click on the folder and assign miko_sword_normal.tif. At this point, we'll want to open up the Hypershade and graph the materials on the sword. You can do this by clicking Graph > Graph Materials on Selected Objects. Then, on the sword node tree, click on the bump2d1 node and bring down the bump depth value. Generally speaking, the number that I default to when I start testing my bump values is around 0.2. Check in the Arnold Renderview that your bump value isn't too much for the look you want.

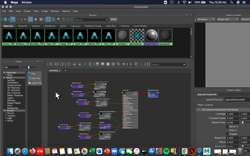
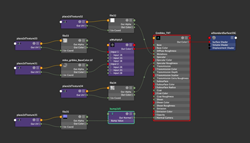
Finally, to finish up the sword shader, we need to add in the ambient occlusion map. With the Hypershade open, disconnect the miko_sword_Base_Color.tif node from the Base Color node by dragging the green arrow away from Base Color. Create a new File node by searching File on the left side under the Create window. In the new File node, assign the miko_sword_ambient_occlusion.tif. Then, create a new aiMultiply node. Drag to connect the Base Color into Input 1, and the Ambient Occlusion into Input 2. Connect the Out Color of the aiMultiply node to the Base Color of the main shader node. The aiMultiply node will mix these two maps together, so that the shadows from the AO map appear baked into the base color map.
SCARF
Select the scarf geometry. Right click and drag your cursor down to select "assign new material". From the materials given, select Arnold shader, and in that dropdown, select aiStandardSurface.
Then, in the Attribute Editor, you'll see the default attributes for the new aiStandardSurface shader. Click on the checkerboard to the right of Base Color, click on the file node in the Create Render Node dropdown, click on the folder icon to the right of Image Name in the file node, and choose miko_scarf_Base_Color.tif.
Next, follow the process outlined above to assign the miko_scarf_Roughness.tif image to the Specular Roughness node.
Then, scroll down in the attribute editor and click on Geometry. Click on the checkerboard to the right of Bump Mapping, click on file, and next to Bump Value click on the arrow. Click on the folder and assign miko_scarf_normal_combo.tif. Open up the Hypershade and graph the materials on the scarf. You can do this by clicking Graph > Graph Materials on Selected Objects. Then, on the scarf node tree, click on the bump2d1 node and bring down the bump depth value.
Finally, to finish up the scarf shader, we need to add in the ambient occlusion map. With the Hypershade open, disconnect the miko_scarf_Base_Color.tif from the Base Color node by dragging the green arrow away from Base Color. Create a new File node by searching File on the left side under the Create window. In the new File node, assign the miko_scarf_ambient_occlusion.tif. Then, create a new aiMultiply node. Drag to connect the Base Color into Input 1, and the Ambient Occlusion into Input 2. Connect the Out Color of the aiMultiply node to the Base Color of the main shader node.
HEAD
Select the head geometry. Right click and drag your cursor down to select "assign new material". From the materials given, select Arnold shader, and in that dropdown, select aiStandardSurface.
Then, in the Attribute Editor, you'll see the default attributes for the new aiStandardSurface shader. Click on the checkerboard to the right of Base Color, click on the file node in the Create Render Node dropdown, click on the folder icon to the right of Image Name in the file node, and choose miko_head_Diffuse.tif.
Next, follow the process outlined above to assign the miko_head_Glossiness.tif image to the Specular Roughness node.
Then, assign miko_head_Specular.tif to the Specular Weight node.
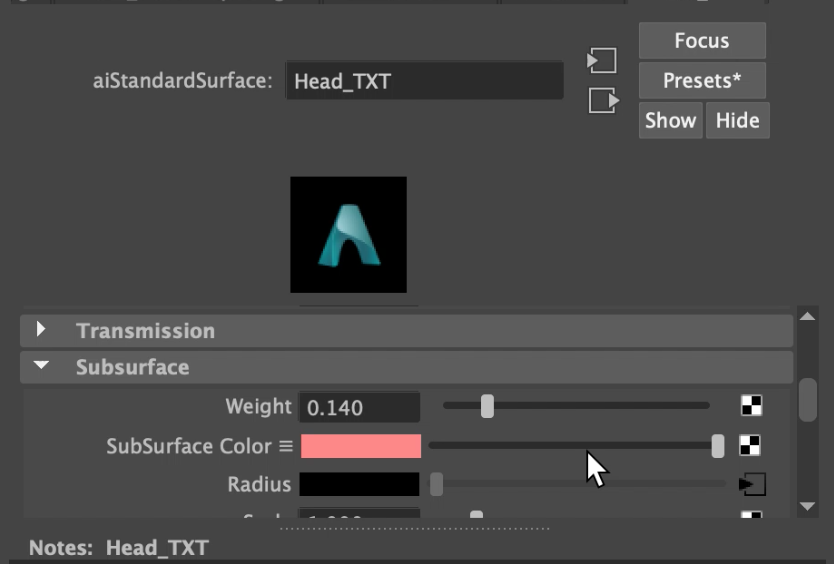
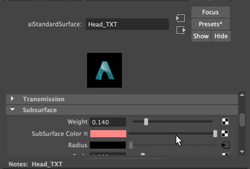
Scroll down in the attribute editor and click on Subsurface. On Subsurface color, color pick a reddish shade that suits the look that you want. Subsurface scattering gives the illusion of blood underneath the skin. On Subsurface Radius, click on the checkerboard and assign miko_head_thickness3.tif. Move the Subsurface Weight slider up and down to fit your preference.

After that, scroll down in the attribute editor and click on Geometry. Click on the checkerboard to the right of Bump Mapping, click on file, and next to Bump Value click on the arrow. Click on the folder and assign miko_head_Normal_DirectX.tif. Open up the Hypershade and graph the materials on the head. You can do this by clicking Graph > Graph Materials on Selected Objects. Then, on the head node tree, click on the bump2d1 node and bring down the bump depth value. Check in the Arnold Renderview that your bump value isn't too much for the look you want.
Finally, to finish up the head shader, we need to add in the ambient occlusion map. With the Hypershade open, disconnect the miko_head_Diffuse.tif from the Base Color node by dragging the green arrow away from Base Color. Create a new File node by searching File on the left side under the Create window. In the new File node, assign the miko_head_Mixed_AO.tif. Then, create a new aiMultiply node. Drag to connect the Base Color into Input 1, and the Ambient Occlusion into Input 2. Connect the Out Color of the aiMultiply node to the Base Color of the main shader node.
HAIR
Select the hair, eyebrows, eyelash, and hair tie geometry. Right click and drag your cursor down to select "assign new material". From the materials given, select Arnold shader, and in that dropdown, select aiStandardSurface.
Then, in the Attribute Editor, you’ll see the default attributes for the new aiStandardSurface shader. Click on the checkerboard to the right of Base Color, click on the file node in the Create Render Node dropdown, click on the folder icon to the right of Image Name in the file node, and choose miko_hair_BaseColor_Alpha.tif.
Next, follow the process outlined above to assign the miko_hair_Roughness.tif image to the Specular Roughness node.
After that, scroll down in the attribute editor and click on Geometry. Click on the checkerboard to the right of Bump Mapping, click on file, and next to Bump Value click on the arrow. Click on the folder and assign miko_hair_normal_base.tif. Open up the Hypershade and graph the materials on the hair. You can do this by clicking Graph > Graph Materials on Selected Objects. Then, on the hair node tree, click on the bump2d1 node and bring down the bump depth value. Check in the Arnold Renderview that your bump value isn't too much for the look you want.
GRIBLES
Select the gribles geometry. Right click and drag your cursor down to select "assign new material". From the materials given, select Arnold shader, and in that dropdown, select aiStandardSurface.
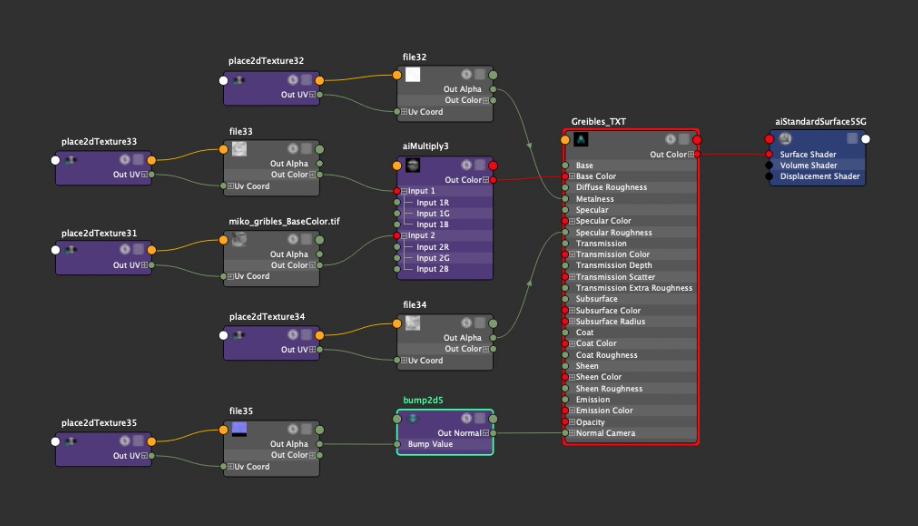
Then, in the Attribute Editor, you’ll see the default attributes for the new aiStandardSurface shader. Click on the checkerboard to the right of Base Color, click on the file node in the Create Render Node dropdown, click on the folder icon to the right of Image Name in the file node, and choose miko_gribles_BaseColor.tif.
Next, follow the process outlined above to assign the miko_gribles_Roughness.tif image to the Specular Roughness node.
Additionally, assign miko_gribles_Metalic.tif to Base Metalness.
Then, scroll down in the attribute editor and click on Geometry. Click on the checkerboard to the right of Bump Mapping, click on file, and next to Bump Value click on the arrow. Click on the folder and assign miko_gribles_normal_base.tif. Open up the Hypershade and graph the materials on the gribles. You can do this by clicking Graph > Graph Materials on Selected Objects. Then, on the gribles node tree, click on the bump2d1 node and bring down the bump depth value to one that fits the look you want.
Finally, to finish up the gribles shader, we need to add in the ambient occlusion map. With the Hypershade open, disconnect the miko_gribles_BaseColor.tif from the Base Color node by dragging the green arrow away from Base Color. Create a new File node by searching File on the left side under the Create window. In the new File node, assign the miko_gribles_ambient_occlusion.tif. Then, create a new aiMultiply node. Drag to connect the Base Color into Input 1, and the Ambient Occlusion into Input 2. Connect the Out Color of the aiMultiply node to the Base Color of the main shader node.
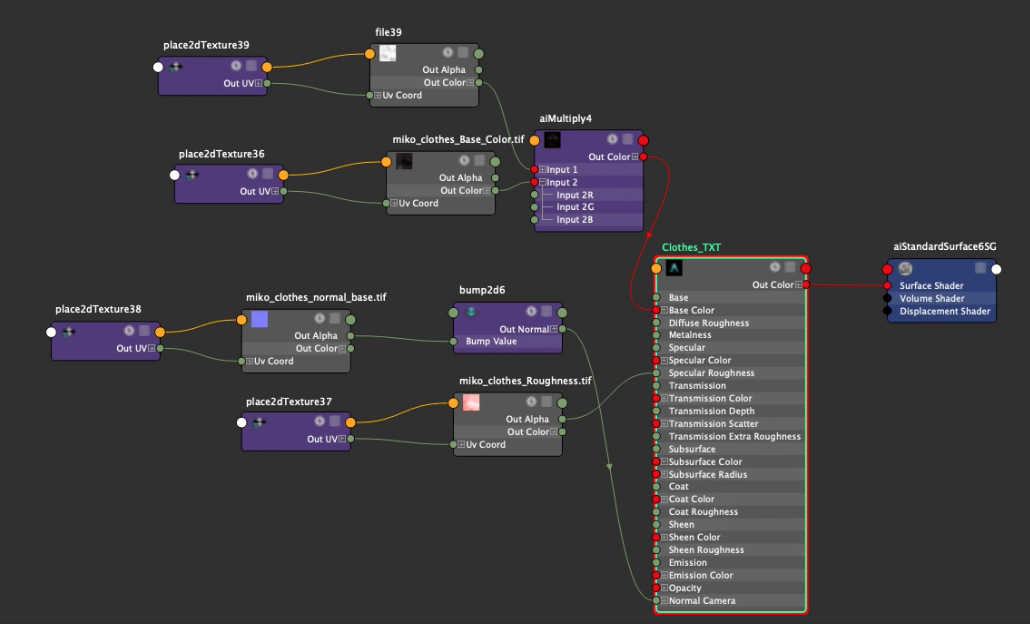
CLOTHES
Select the clothes geometry. Right click and drag your cursor down to select "assign new material". From the materials given, select Arnold shader, and in that dropdown, select aiStandardSurface.
Then, in the Attribute Editor, you’ll see the default attributes for the new aiStandardSurface shader. Click on the checkerboard to the right of Base Color, click on the file node in the Create Render Node dropdown, click on the folder icon to the right of Image Name in the file node, and choose miko_clothes_Base_Color.tif.
Next, follow the process outlined above to assign the miko_clothes_Roughness.tif image to the Specular Roughness node.
Then, scroll down in the attribute editor and click on Geometry. Click on the checkerboard to the right of Bump Mapping, click on file, and next to Bump Value click on the arrow. Click on the folder and assign miko_clothes_normal_base.tif. Open up the Hypershade and graph the materials on the clothes. You can do this by clicking Graph > Graph Materials on Selected Objects. Then, on the node tree, click on the bump2d1 node and bring down the bump depth value. Check in the Arnold Renderview that your bump value isn't too much for the look you want.
Finally, to finish up the clothes shader, we need to add in the ambient occlusion map. With the Hypershade open, disconnect the miko_clothes_Base_Color.tif from the Base Color node by dragging the green arrow away from Base Color. Create a new File node by searching File on the left side under the Create window. In the new File node, assign the miko_clothes_ambient_occlusion.tif. Then, create a new aiMultiply node. Drag to connect the Base Color into Input 1, and the Ambient Occlusion into Input 2. Connect the Out Color of the aiMultiply node to the Base Color of the main shader node.

ARMOR
Select the armor geometry. Right click and drag your cursor down to select "assign new material". From the materials given, select Arnold shader, and in that dropdown, select aiStandardSurface.
Then, in the Attribute Editor, you’ll see the default attributes for the new aiStandardSurface shader. Click on the checkerboard to the right of Base Color, click on the file node in the Create Render Node dropdown, click on the folder icon to the right of Image Name in the file node, and choose miko_armor_Base_Color.tif.
Next, follow the process outlined above to assign the miko_armor_Roughness.tif image to the Specular Roughness node.
Then, scroll down in the attribute editor and click on Geometry. Click on the checkerboard to the right of Bump Mapping, click on file, and next to Bump Value click on the arrow. Click on the folder and assign miko_armor_normal_base.tif. Open up the Hypershade and graph the materials on the clothes. You can do this by clicking Graph > Graph Materials on Selected Objects. Then, on the node tree, click on the bump2d1 node and bring down the bump depth value. Check in the Arnold Renderview that your bump value isn't too much for the look you want.
Finally, to finish up the clothes shader, we need to add in the ambient occlusion map. With the Hypershade open, disconnect the miko_armor_Base_Color.tif from the Base Color node by dragging the green arrow away from Base Color. Create a new File node by searching File on the left side under the Create window. In the new File node, assign the miko_armor_ambient_occlusion.tif. Then, create a new aiMultiply node. Drag to connect the Base Color into Input 1, and the Ambient Occlusion into Input 2. Connect the Out Color of the aiMultiply node to the Base Color of the main shader node.
EYES
For the eyes, we only need to worry about the diffuse map and the emissive map. Create a new aiStandardSurface for the eye geometry and assign eyes_diffuse.jpg to the Base Color. Then, assign miko_emissive.jpg to the Emission Weight.
EYEBOT
Select the eyebot geometry. Right click and drag your cursor down to select "assign new material". From the materials given, select Arnold shader, and in that dropdown, select aiStandardSurface.
Then, in the Attribute Editor, you’ll see the default attributes for the new aiStandardSurface shader. Click on the checkerboard to the right of Base Color, click on the file node in the Create Render Node dropdown, click on the folder icon to the right of Image Name in the file node, and choose eyebot_Base_Color.tif.
Next, follow the process outlined above to assign the eyebot_Roughness.tif image to the Specular Roughness node.
Since the eyebot has emission, we’ll have to scroll down in the Attribute Editor and click on the Emission dropdown. Under Emission Color, assign eyebot_Emissive.tif.
Additionally, assign eyebot_Metallic.tif to Base Metalness.
Then, scroll down in the attribute editor and click on Geometry. Click on the checkerboard to the right of Bump Mapping, click on file, and next to Bump Value click on the arrow. Click on the folder and assign eyebot_normal.tif. Open up the Hypershade and graph the materials on the eyebot. You can do this by clicking Graph > Graph Materials on Selected Objects. Then, on the eyebot node tree, click on the bump2d1 node and bring down the bump depth value. Check in the Arnold Renderview that your bump value isn't too much for the look you want.
Finally, to finish up the clothes shader, we need to add in the ambient occlusion map. With the Hypershade open, disconnect the eyebot_Base_Color.tif from the Base Color node by dragging the green arrow away from Base Color. Create a new File node by searching File on the left side under the Create window. In the new File node, assign the eyebot_ambient_occlusion.tif. Then, create a new aiMultiply node. Drag to connect the Base Color into Input 1, and the Ambient Occlusion into Input 2. Connect the Out Color of the aiMultiply node to the Base Color of the main shader node.
TEXT
To finish setting up Miko’s textures in Arnold, click on the text geometry. These are the two planes located on her armor and one on the eyebot. Assign a new aiStandardSurface shader to this geometry.
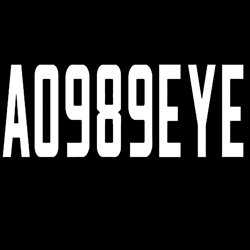
Assign miko_text.tif to the Base Color.
In order to get the opacity to work in Arnold, we’ll need to make an opacity map. This map will be completely black except for the text, which will be white. Think of this map as a mask. If you don’t have this map, you can create one in the image processing application of your choice. I used Photoshop.
Scroll down in the attribute editor under Geometry and select the checkerboard to the right of Opacity. This is where we will assign our new opacity map.
The last step to get the opacity to work is to select each piece of text geometry, select the shape node in the attribute editor, scroll down to the Arnold tab, and uncheck the Opaque box.
Finally, you can assign a white aiStandardSurface to her teeth and a pinkish one to her gums to finish Miko up completely, by color picking in the Base Color.
Below is a cheat sheet to help clarify which types of common maps correspond to which nodes:
Diffuse/Base Color = Base Color
Roughness/Glossiness = Specular Roughness
Specular = Specular Weight
Emissive = Emission Color
Normal = Bump
Metallic = Metalness
Thickness = Subsurface Radius
And there you have it! This same process can be replicated for any character or object that you have maps for.
Other Opinions, Further References, Typos, and Grammar Issues please contact KielFiggins22@gmail.com