
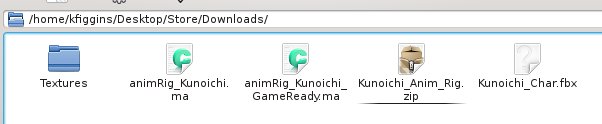
3. Kunoichi_Char.fbx : The T-pose character FBX to be used with Game Ready Assets as a base in the engine
4. Textures Folder : Contains another zip file of the textures associated with the AnimRigs
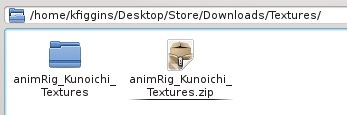
3. Inside the Textures Folder unzip the zip file, an animRig_Kunoichi_Textures folder should appear
4. Open Maya
5. Open the animRig_Kunoichi.ma file
6. The character will likely appear grey, so you'll need to remap their texture paths
1. Maya > Windows > Render Editors > Hypershade
2. Hypershade Window > Click the Textures Tab
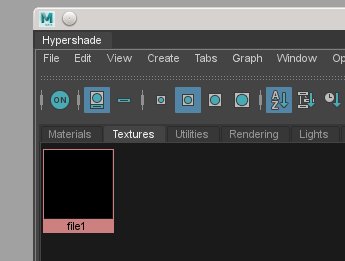
3. Select 'file1'
4. Open the Attribute Editor (default Hotkey is ctrl+a)
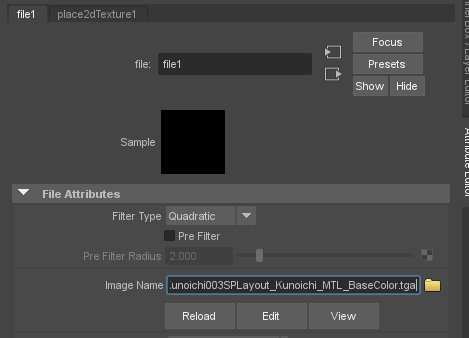
5. Attribute Editor > Click the folder icon next to the Image Name Path
6. Navigate to wherever you unzipped your textures directory and select the associated image file, click 'Open'

7. Repeat these steps for each texture file
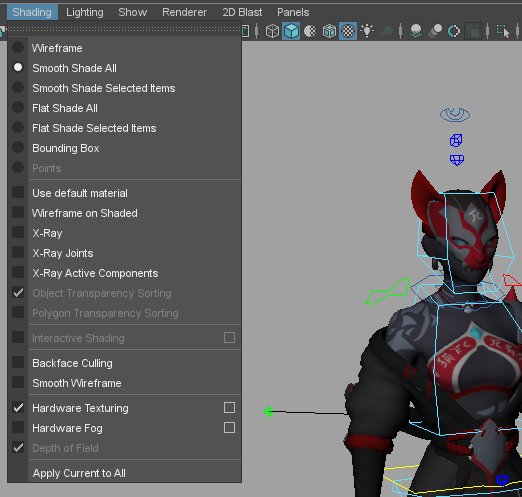
7. The character may still appear grey in the viewport, so be sure the viewport is in Shaded and Textured mode
1. Viewport > Shading Dropdown > Check Smooth Shade All and Hardware Texturing
2. You can also click the small cube and and checked sphere icons
8. Now that the textures are mapped, save the rig file. This same process would be used to remap the textures in the animRig_Kunoichi_GameReady.ma file.
Referencing the Rig into your animation scene
1. With the textures mapped in the rig file, create a new scene (File > New Scene)
2. Reference in the AnimRig
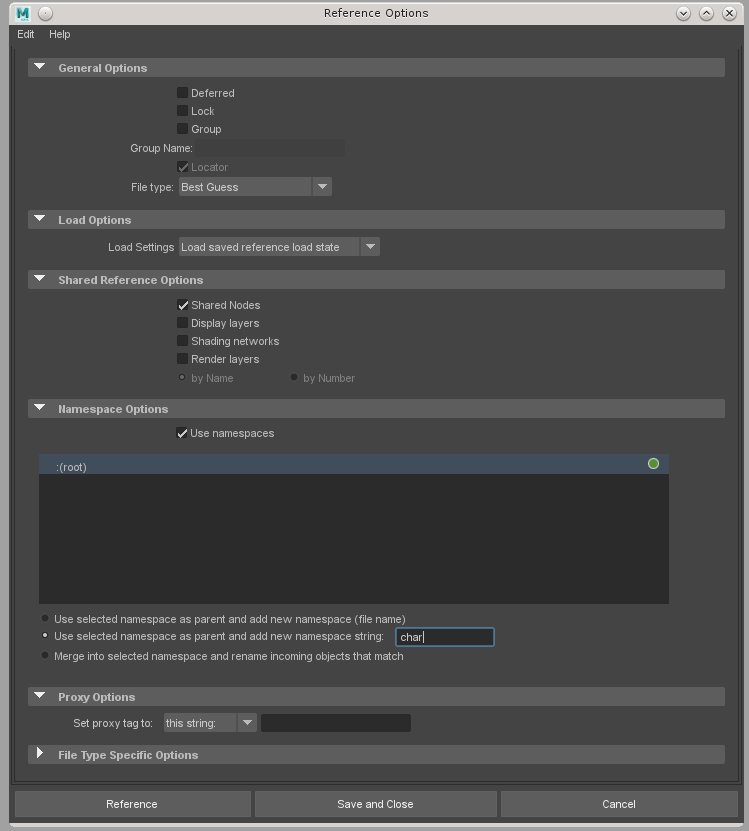
1. File > Create Reference > Option Box
2. Reference Options Window > Edit > Reset Settings
3. Reference Options Window > Namespace Options > Select 'Use selected namespace as parent and add new namespace string:'
4. Reference Options Window > Namespace Options > In the Namespace field, type: char
5. Reference Options Window > Click 'Reference'
6. Select the animRig_Kunoichi.ma and click 'Reference'
*You can find out more about referencing Here
3. Now that the rig is referenced into the scene, you can start animating
Exploring the features of AnimRig
General guide lines when animating with an AnimRig
1. Only animate on Nurbs Curves prefixed with CTRL_
2. The rig is not built to be pickwalked so please select the control curves directly
3. The limbs have IKFK and blending options, click Here for the script to do matching and baking
4. All tools associated with this rigs (IKFK, Webbing, Game Export, Mixamo Transfer, etc) only work if the rig is referenced
5. To select all animatable controls, to set a global key pose for example, Select > Quick Select Sets > char:KunoichiCtrls
6. On older versions of the rigs, some channels like IKFK went from 0 to 10, and need the user to manually toggle the visibility of the additional controls, this process has been automated in the newer versions
7. On the CTRL_Head, setting Neck Translate channel to 1 will lock the head to the head control and stretch the neck
8. On the CTRL_Spine_Pinner, you can turn off spine stretch by setting the stretch channel to 0
9. For more cartoony characters, you can adjust the amount of squash in the spine from the CTRL_Spine_Pinner's squash channel, sitting it to 1 and moving the hips closer to the chest should push out the body
10. To have the arms/legs IK in chest/hips space, on the CTRL_R__Hand set the IKWorldLocalPos channel to 10
Standard Features include
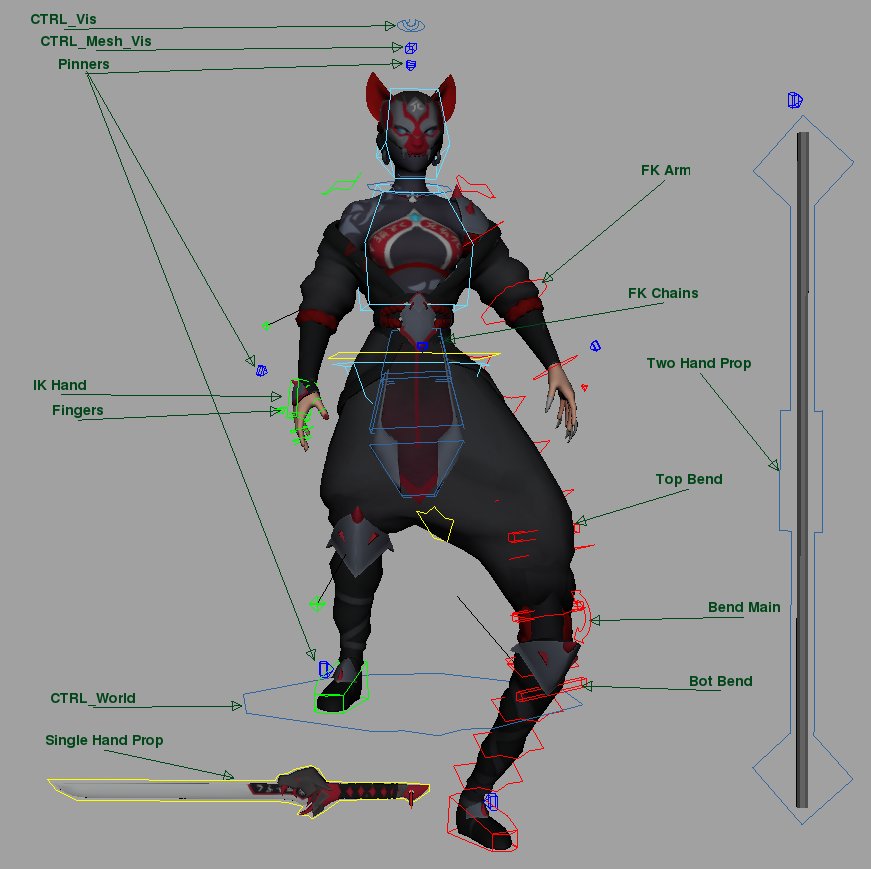
CTRL_Vis : This control holds the visibility for all the accessories and rig extras
CTRL_mesh_Vis : This control holds the visibility for all the additional meshes, such as low poly, props and costume variants
Pinners : These controls hold various options and settings for that limb, such as revealing additional controls, IKFK and many more
CTRL_World : Use this control to place your character in the scene as well as scale the character up or down with the scaleAmount channel
IK Arms/Legs : These controls manipulate the limb in IK as well as control the limb length and stretching options
FK Arms/Legs : These controls rotate the limbs in FK
Fingers : These controls hold the attributes for curling the fingers, as well as the visibility channels (FKFingerVis) for the finger FK
FK Chains : The base of each FK chain has additional channels for rotating the entire chain per axis, adjusting the length and pinning, world (0) being the scene and local (1) being whatever it's attached to. Also, each chain control has a viewMicro channel to reveal an additinoal control to adjust the chain without changing the controls below it
Bend Main : Limbs have a Bend option, visible from the pinner, to allow more cartoony motion and per joint control, top and bottom bend channels also off the limb for nore noodle like arms
Single Hand Props : Newer versions of rigs have a PropAB visible from CTRL_Vis, with mesh options visible from CTRL_Mesh_Vis to toggle from Sword/Gun, a Pinning channel found on the control allows you to snap the prop to different hands and spaces
Two Hand Prop : Newer versions of rigs have a PropC visible from CTRL_Vis, with mesh options visible from CTRL_Mesh_Vis to toggle from Sword/Staff/Rifle, a Pinning channel found on the control allows you to snap the prop to different hands and spaces, on the CTRL_PropC_Pinner, the weapon pinning channel toggles between different setups:
Global : moves freely
Single Handed : Acts like a Single Hand Prop, where pinning spaces are found on the main control, CTRL_PropC_SHP
Right Hand Driven : Typically for a staff or rifle where the gun is in the right hand and the left hand is driven by the prop. Also, a new control is visible, CTRL_PropC_L_Hand_Slider, this allows another level of control for the hand to slide along the prop
Weapon Drives Hands : The prop moves globally while the hands are attached. Two new controls are now visible CTRL_PropC_L_Hand_Driven_Slider and CTRL_PropC_R_Hand_Driven_Slider allowing another level of control
To have the hands attach to the prop, on the CTRL_PropC_Pinner there are Right and Left Hand to Weapon channels, set the desired channel to 1. Do note the left hand can only attach to rightHandDriven and WeaponDrivesHand spaces, while the right hand only attaches to WeaponDrivesHand space